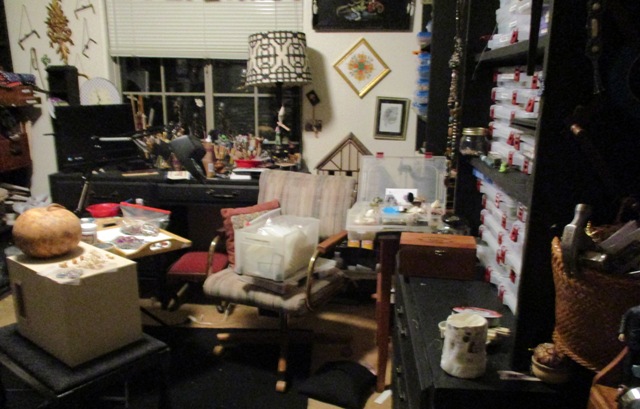
I did it again! I started cleaning out supply boxes... Guess who showed up to help?
She stood there until I put the floral ribbons around the one unfinished hat and then plopped it on her head.
Tessie is in heaven. A whole box full of hats and hat stands.
Unfortunately, that reminded her of the hat shop that she demolished to get her cottage back. Now... Guess who wants a new hat shop?
I am thinking that it would be easier to talk her into an addition on her cottage. A new hat storage room?
I do have that one room box like Amare's that I got before Christmas. It is all put together and ready to go.
Maybe it would just be easier to make that one into a hat shop.
That way I wouldn't have to attach it to her cottage. If she had it as a business, she probably wouldn't wear all of the hats. She would just try to sell them and add to her fortune.
Spike did abscond with one of the hats. I think that I made it for Zar a while ago. Sorry Zar.
He also found a couple of friends in one of the boxes.
He is pretty good about keeping them separated. After all, Rattlers and bunny rabbits don't usually like each other much.
Anyway, I am not going to Witches today. Kota woke me up at 2:08 AM to tell me that it was raining outside. Every time I would just about get back to sleep, he would announce it again. I woke up for the last time about six. With a runny nose and a little bit of a sore throat. I don't want to give it to the other witches, so I think that I am going to opt out for today. I might even get a few more spaces cleaned out in the workroom.
Wish me luck.
See you tomorrow.
Don't forget to poke the photos to enlarge!
Showing posts with label hats. Show all posts
Wednesday, February 28, 2018
Thursday, October 19, 2017
More Fun.. With Pizza!
I had three friends over today. Two Witches and a Witch's Sister...I helped one with her hatmaking and the other two were here for other reasons.
We had fun and frozen pizza.
They didn't get into the workroom. It is getting worse. I will have to do some cleaning before Walter finishes playing golf...
Oh well. He never goes in there anyway... Maybe I will just keep messing it up until I get finished with Albert...
I think that I have enough photos of Albert saved. I plan on starting the sculpting tomorrow.
I decided not to make the three year old. Nobody would know who he was at that age.
I am going with the wild white hair version.
That's how most people recognize him.
I have to go now and see if I have any white(or gray) hair. If I don't, that means a trip to search for hair tomorrow.
See you then.
Wednesday, October 18, 2017
Witches' Envy...
Tessie liked the hat, but wanted more...
Not going to happen Tessie.
Tomorrow I want to start on Albert.
Walter is going golfing for four days and will not require feeding or a clean house...
Actually, that's a good thing. The workroom is starting to fill up again... That's NOT a good thing.
Before I start Albert, I had better do a bit of straightening in the workroom. If I don't, I won't be able to find any of the tools or supplies that I am going to need to start on Albert...
Wish me luck. I am going to need it to get this mess cleaned up. Then Albert, here we come!
See you tomorrow.
Wednesday, September 13, 2017
A Dark and Stormy Night....
Today the witches came here for the afternoon...
We made hats. I haven't done any for a long time and it was fun. I got them going with some velvet ribbon and patterns. Some of the others brought trims to share.
First they got a tour of my "new workroom". They were very impressed. Some had never seen it before. That's how bad it was. I have been known to post large KEEP OUT! signs on the door in desperation.
They were very impressed. A clean room can do that. If the owner has a reputation for being very MESSY.
Now we are waiting for the storm that may or may not be building off to the west. I am hoping for rain, so that I won't have to water tomorrow... I am NOT holding my breath. It looks dark, but no sprinkles yet...
Back to clean up duty in the kitchen.
See you tomorrow.
Labels:
hats,
real life in AZ,
Wednesday Witches,
workroom
Wednesday, October 26, 2016
Way Too Much Fun!
Was had by all... The party started in the Tudor Trailer before I even got out of bed and was still going strong when the Witches' party finished.
The Skeleton Crew escaped their basket and joined the fun...
They were all over the family room and as I feared, the Skeleton Crew has doubled in size! The girls in the aprons fit right in with the boys.
I hear talk that they are forming a union and are going out on strike if I don't let them stay out this year... We shall see... I think that I have a butterfly net somewhere around here. That should do to round them up.
As for the big witches, we made hats and brooms.
I made rose making tools for everyone. We didn't have time to learn that today. Next week we will do those.
Sorry that this is late. After everybody left, I fell asleep. I'm up now... Maybe I will go make some roses or clean up the family room and kitchen...
No... I think I will watch TV for a while and then go to sleep for the night.... It has been a LONG day!
See you tomorrow.
Saturday, September 10, 2016
Done With the Bun!
This morning I did a picture hat for Tessie...
One problem. The bun wouldn't fit inside. More about that later.
Here is the pattern. I put the measurements on it, but again, if you can resize it in one of your programs It will come out more true to scale.
She insisted that she needed a hat to match the apron that she is wearing... I can see more hats to come...
There are a lot of ways to make hats. This is just the way that I devised over 30 years ago and I am stuck in a rut.
I glue the fabric to one side of the cut out cardstock pieces. I cut many Vs in the edge of convex curves(outside). Many slits in the concave(inside) side.
Next I glue all of the tabs around to the opposite side. Let them dry a bit.
Then glue the lining to the inside of the cardstock over the tabs. Trim the fabric even with the edge of the piece
Here is one partially trimmed. The bottom side and the middle.
After that, I glue the crown piece together. A to A. The brim, B to B.
Then I glue the crown to the brim.
I then cut a top piece to fit exactly over the top edge of the crown. Cover it the same way and glue it in place.
Go wild decorating it... Unless Tessie wants it plain.
There are two different brims pictured above. The first one is the one on the hat. It has a lot of curve. The one in the above photo, that is half covered and cut, has a smaller piece cut in the back and will be more flat.
Tessie preferred the first one. And here she is. She tried it on and couldn't get the bun in the crown.
To my astonishment, she grabbed a pair of my small, sharp scissors and started hacking at her bun.
I stopped her before she was totally bald... She hesitated and then thanked me for it.
This means that the afternoon will be spent giving Tessie a new hairdo. It's about time. She has had this bun for over a year... Maybe even two.
Out with the old and in with the new. She tried to talk me into giving her blond hair. I talked her out of that. No one would know her as a blond. Her only request...er.. Demand was that she could wear hats over her hairdo. I don't think that I like the sound of that...
I see a lot of hat making in my future. At least she has a good start. When we closed the hat shop and made it into a place for her to sew, she squirreled away all of the hats.
I have to admit that she does look nice in the ones that I just made... I do believe that I am going to make her sign a contract saying that she will wear every hat that she owns at least one day before she starts demanding new ones. Maybe "Hat Mania" will wear off before she finishes wearing them all.
Back to being a beautician. See you tomorrow.
Friday, September 9, 2016
It Fits!
That was Tessie this morning after I finished the first hat. She loves the bonnets, because there is a place to put her bun!
OK. Here we go. I am doing the first one with the velvet floral ribbon.
The first thing that you do is cut off a piece double the size of what you need and crease it crosswise in the center. Spread white glue on one side. I use my syringe and try not to get it too thick. Just enough to hold the ribbon together.
Then let it dry. I sometimes do this step the day before, so that I won't have to wait.
This it the three piece pattern. Starting with the top left piece. That is the side of the crown. The piece next to that is the brim. You can cut that out with other shapes if you want. The one that I am making will be with curved corners.
Probably your best bet is to enlarge the pattern on one of your programs, so that the brim is exactly three inches from point to point. That way the rest of the pattern will be exactly the right size. It doesn't have to be exact, but it will turn out better if it is. Just so all of the measurements are relative to one another.
Next you lay out the pieces on your ribbon. Cut them as exact as you can. This part is important.
The top of the back is not really a pattern piece. It is just approximate. I glue that on and then trim around it with fine scissors.
These metal hair clips are the best thing that I have found to hold it together until the glue dries.
There is a lot of waiting for the glue to dry. That's why I usually plan to do several at a time.
After you have the body of the hat glued and dried, glue the last piece to the opening on the top edge of the back. Let it dry and then trim it.
After that, you can trim and decorate it any way you want to.
I did this one with two bands of angel lace running over the brim and crown. Then, I ran unraveled Bunka around the edges... Up the back and around the crown.( Angel lace is a type of lace that they use in women's underwear at the edge of bras and other unmentionables. I usually find it at mini shows.)
I glued one strip of ribbon over the seam between the brim and the crown. I left a tail for tying on either side. Then, one loop at a time, I glued ribbon, in a bow shape on either side. You can make the bow separate and glue it on or just do it one loop at a time as I did.
This is the point where Tessie started getting hysterical. "IT FITS!" Over my bun! It fits!....
She grabbed it and posed for the photo. Then, assuming that I made it just for her, she zapped out of the room. I have seen her in several places showing it off to other mini people.
You would think that I never made her anything, the way that she is acting.
At least for today, I made her a happy camper.
I don't think that she will be as happy with the one tomorrow. I may have to make it to fit over her bun too.
I will give you the right pattern, no matter what. She doesn't have to know that I adjusted it for her big head!
The one that I make tomorrow will be with regular fabric. That's so you can do all of the hats either way... I do like these with the ribbon though. They are stiff without all of the extra work that fabric involves.
Back to work.
See you tomorrow.
Thursday, September 8, 2016
Hat Trick
Someone asked if I would do a tutorial on the hat that I learned yesterday. I can't share something that isn't mine. It wouldn't be right...
But I can share my own hat pattern or possibly patterns.
I went to look for the box that I keep all of the hat stuff in... Oops....This is what it looks like right now.
I forgot that I took Tessie's hat shop apart not to long ago.
Therefore, everything is a mess... So what else is new?
I used to sell hats at shows. They were of my own design so some of those I can share with you.
Each of the three photos that you see here were developed over the years and parts of them are interchangeable to make different versions.
The first photo is a cross between a bonnet and a flat brimmed hat. The brim is more conical than flat. Each one trimmed to the way I wanted it to look. These were popular in the Empire period and later.
The second one is my bonnet pattern It's just one pattern, but looks quite different in each case. It is a matter of trim and how you cut the brim part. This was a popular style a little later on. Up to the 1860s and 70s.
The last one is a more or less flat brimmed hat. It can be made just plain flat or it can have a small piece cut out to make it more conical. It has made an appearance here and there at different times in the 18th and 19th centuries.
Again, these three are basically the same hat. It's just the curve of the brim and the trim that make them different.
I am going to have to go back and make new patterns for each of the three. Then I will, one at a time, show you how to make them.
There is a secret to all of these hats. They are made from the velvet ribbon that you buy for decorating at Christmas, weddings and such. I am going to go get some of the satin finished stuff and see if that works too. I bought rolls of the velvet years ago and have enough to make hats from now 'til doomsday! It doesn't take much to make one hat.
Anyway, I am going to go now an rework all of the patterns for you... Hang in there. I may throw in a couple of hat stands for good measure. I will try to start tomorrow.
See you then!
But I can share my own hat pattern or possibly patterns.
I went to look for the box that I keep all of the hat stuff in... Oops....This is what it looks like right now.
Therefore, everything is a mess... So what else is new?
I used to sell hats at shows. They were of my own design so some of those I can share with you.
Each of the three photos that you see here were developed over the years and parts of them are interchangeable to make different versions.
The first photo is a cross between a bonnet and a flat brimmed hat. The brim is more conical than flat. Each one trimmed to the way I wanted it to look. These were popular in the Empire period and later.
The second one is my bonnet pattern It's just one pattern, but looks quite different in each case. It is a matter of trim and how you cut the brim part. This was a popular style a little later on. Up to the 1860s and 70s.
The last one is a more or less flat brimmed hat. It can be made just plain flat or it can have a small piece cut out to make it more conical. It has made an appearance here and there at different times in the 18th and 19th centuries.
Again, these three are basically the same hat. It's just the curve of the brim and the trim that make them different.
I am going to have to go back and make new patterns for each of the three. Then I will, one at a time, show you how to make them.
There is a secret to all of these hats. They are made from the velvet ribbon that you buy for decorating at Christmas, weddings and such. I am going to go get some of the satin finished stuff and see if that works too. I bought rolls of the velvet years ago and have enough to make hats from now 'til doomsday! It doesn't take much to make one hat.
Anyway, I am going to go now an rework all of the patterns for you... Hang in there. I may throw in a couple of hat stands for good measure. I will try to start tomorrow.
See you then!
Wednesday, September 7, 2016
I Almost Forgot!
Between a full day of rain, a doctor's appointment and a Wednesday Witches' meeting, I almost forgot to write the blog.
Walter came in just a little while ago and asked if I was going to write the blog!
I grabbed the camera and took photos of three things of interest and got to work.
The first was the hat that I made at Witches. Jeannie taught a different technique than I had used before, so it was interesting to try something new. I made a hat to match Tessie's bag. Of course that saved me from having to explain where I was all day... She grabbed them. Let me take a photo. And then she ran.
When I was looking for things to take along to Witches, I found this rug that I started a while ago. I am going to have to get back to it. I think it is one of the better antique designs that I have found on the net. Now if I can only find the thread colors that I was using... I will be back in business.
I took my trusty traveling workshop with me to the meeting. I happened to have the bag in there and some matching fabric. Jeannie provided the paper pieces to work with and I used a bit of her bunka for the trim. Thanks Jeannie! The class was fun.
I had some thin black silk ribbon in my stash so I put a bow on the back. That completed the hat.
I forgot to put my rose making tool in the box, so the ribbon will have to do until I find it. Then I will add a couple of roses to the back to go with the red fabric. It was fun learning a different technique.
Tomorrow, I am going to actually do some mini-ing! I promise.
See you then!
Labels:
hats,
mini workbox,
rugs,
Tessie,
Wednesday Witches
Sunday, May 15, 2016
Back to Normal....
When I got home from grocery shopping this morning, I found Tessie in the potion room of the townhouse...
I made the mistake of asking what she was up to. She said the nail polish, nail polish remover and other implements on the tray would make a potion of great strength... They smelled like it!
I have never known her to polish her nails or even clip them. They just grow to a certain length and stay that way...
Then I figured it out. She was trying to get out of cleaning her closet. I had mentioned that I needed to clean mine... She must have taken that as a hint...
I shoved her into her closet and then went to clean out mine...
I paid no attention to the wailing and whining coming from the direction of her closet... Mine was bad enough.
Then, suddenly there was total and utter silence...
That can't be a good sign...
I went in and found her clamoring to get out from under the pile of aprons that were overtaking the area...
Then I simply smiled sweetly and said, "I don't think that you need any more aprons, Tessie!"
She frowned and clamored over the pile. Then she disappeared in a puff of smoke! It took me a while to figure out where she went... When I did, this is what I found.
She growled at me from under the basket... "I have a new bedroom. I don't need that house anymore. You clean it, if you want it clean! If you need to contact me, I will be in my new bedroom with all new possessions!"
Then, dragging one foot to keep the basket tray with her, she headed for the new bedroom...
I am always one step ahead of her. I got between her and the new bedroom. I carried it back to the workroom.
If she is going to make a mess of that bedroom too, she is going to do it behind a closed door where nobody can see the mess.
I am off to hunt for something else to do now. If I want a mess, I will make it myself!
See you tomorrow.
Friday, September 25, 2015
Minis Can't Keep You Awake...
I proved that today. I kept falling asleep all through the hours of chemo.
This morning I got out the box of book supplies. I was going to put some of them in the workbox for today...
To my great surprise, I found a huge supply of made books and magazines already to put on shelves.
It must have been the house elves that did it. I don't remember making them.... Maybe I did it while doing chemo. For some reason, the drugs let me work a blue streak. Punctuated by short cat naps.
Having Kota around, I know about those. It also helps to know about them when you are about to do chemo and bookbinding in the same time frame...
I switched over to the unfinished baskets, in the basket box.
I did all of the open work in the center rows of the basket and then started closing the top in, by drawing the wire in closer to the center as I went.
It is done with a four stitch wrap. That is you wrap the string/cord around the base wire four times and then drop it down to the row below that one and attaché it by running it through the bottom of the row before.
I also ran across an almost finished tray basket with a copper drop. It still needs a coat of varnish on the bottom. If it is to be used, I will have to put a layer of plastic over the top... I may just hang it somewhere and let it be decorative.
Tessie found five hats in the work basket and accused me of hiding them.. whinging and whining, "How could you? I can always use a new hat or two... Or three".
She would have you believe that she did all of the work on the yellow basket...
She didn't I did the work whilst taking a chemical bubble bath...(Not really.) Just a bunch of stuff leaking into me, while I worked. The doctor is very pleased with my progress... Not at basket weaving. Just at my ability to heal and shrink tumors with her help.
One more treatment to go and then they re evaluate what is happening so far.
I may be a little late, but I am going to try not to break a seven and a half year streak of every day blogging. Eight years in February!
See you tomorrow!!
Friday, January 3, 2014
Only One Pattern Piece....
I decided to give you directions for the easiest hat that I have come up with yet. If you want me to keep going with more complicated ones, just yell.
This is the only pattern piece that you need. You will notice that the center hole is just a smidgen off center. The narrower part goes to the back.
You will cut one of these, plus a square of your material between two and three inches. I use a pencil to trace it. The edges are going to be covered with trim and the pencil marks can be covered.
I use hardanger, congress cloth or Aida for this. They have some natural stiffness to begin with and when you add the hair spray, they are very stiff. I can't recommend regular dress fabric. I don't think that it would hold the shape or be stiff enough in the end.
.
The form for the crown of the hat is a 3/4 diameter wooden ball that you can buy at Michael's or other craft stores. Look in the craft wood section.
It has a small flat spot on one side and I glued that to a 1/2" dowel piece, long enough to hold. About 3 to 4 inches.
First you wet the fabric, and smooth it over the ball. Wrap a rubber band around it.
Then you shoo away the cat and pull down on the fabric. First on the corners and then on the straight of goods.
It should look like the photo to the left. No longer wrinkled.
Notice that the rubber band is almost to the bottom of the ball.
See the hat at the side? That one is made of congress cloth. You only use about half of the cloth stretched on the ball, but you have to make it longer because you are going to want an area to glue the brim to.
When you have it the way that you want it, spray it and the brim piece with extra hold, unscented hairspray. A couple of coats.
When everything is dry, take the brim piece and gently pull it down over the crown(still on the form).
When you get it where you want it, use a glue syringe or a toothpick to put some glue between the brim and the crown of the hat all the way around. You can spritz it again with hairspray if you want to.
Let it dry thoroughly!. Then roll the rubber band down the dowel and ease the hat off by the edges of the crown. Not the brim.
When you get it off, simply turn the hat over and cut off the extra crown fabric. Be sure that there is glue all around as you go and leave just a little of the crown material on the edge.
Now go forth and decorate it to suit your fancy. Do trim the edge of the brim and the place where the brim meets the crown on the outside.
The hat on the left is congress cloth and I need to find a pair of small, sharp scissors and do some more trimming on the crown edge. The one on the right is Aida cloth and was just trimmed and then rubbed with glue.
I have to go back to work now. I finished 11 hats yesterday.
Tessie announced, when I was finished, "Either you need to make bigger hats or you have to make my bun smaller! I can just barely wear these and they are mighty uncomfortable!".
Here I thought that she was going to sell them and make lots of money. Nope.
I think that a new hairdo is much easier than remaking 11 hats. I am off to pull Tessie's hair now. It's called getting even. I wonder how she would look in pigtails?
See you tomorrow...
Thursday, January 2, 2014
Outside the Box.....And Back to the Real World....
Tessie assailed me this morning with, "How about something for me this morning....I need a new....HAT!". Yes, there were pauses between the words. She had to come up with something that I could make just for her.
OK...It wasn't very big, as her suggestions go , so I took her up on it before she could go for a new house.
I dug out the hat making box, and to my horror, it looked like a few cats and mice had been fighting inside.
Tessie's not much help when it comes to sympathy. She took one look at the box, waded through the compartments, making things worse. Then she found one of three finished hats in the whole box.
She sat down on the edge of the box and announced, "I am prepared to wait as long as it takes. I don't like this one. Do another one."
Since I had fourteen unfinished hats to choose from, it wasn't hard. I let her choose one that she liked and in about 10 minutes, I had it done. A ribbon, two roses and a bunch of leaves was all it took to make her happy.
She went back to the edge of the box and sat down again.... She glared at me and hissed....
There are 13 more unfinished hats and lots of hat stands that need finishing! You have been holding out on me. I can sell these in the hat shop and make a lot of money. Get back to work!"
With that, she left, with the frog hanging on to her shoulder.
I guess that I should be thankful that she didn't think of Spiderwort Manor. At least she doesn't want me to build more. She just wants the hats finished.
Back to work. Where's the rose making tool?
See you tomorrow.
Saturday, March 3, 2012
But I Digress......
Bunka was originally used for a kind of Japanese punch needle type of embroidery. People still do it, but I have never tried it.
It is a rayon thread that is somehow knit and when you pull on the end, it unravels into this really neat wrinkly strand. It should be pulled out as you use it. It is best to store it un-pulled, still on the card.
The above zebra skin rug is a finished example. The "hooked" rug beside it is in progress. I started it and put it down a year or 5 ago...Yup. The six year old's attention span strikes again. In my defence, this is the second one of that design....I finished it once already.
Anyway, this is how you make bunka rugs. http://caseymini.blogspot.com/search?q=bunka+rug There are a few entries on how to do it.
You can also make buds on mini flowers in pots, among other things.
One of my favorite uses of it is for cording on soft furnishings like the Chinese Chippendale Cornice in the previous entry.
Tessie's favorite use is for trims on clothing and hats. The one that she is wearing has leaves of bunka. The peach silk that she is holding has white bunka around the top of the crown and the edge.
The three around her feet are corded around the edge and crown with it and all have some filler flowers and leaves of bunka.
The last example is one of my beds. There is white bunka around the tufted silk headboard. The lavender floral fillers are all bunka. The only flowers are the silk roses. The rest is illusion.
I rest my case. Bunka is a really good thing to have on hand. It comes in many colors. It just depends on where you order, what colors are available. I usually purchase mine at mini shows, where I can see the selection. I just counted the ones that I have. I have 91 cards, counting the ones with metallic thread in them. I have a few duplicates of colors I use a lot, but not many. The colors vary from company to company. A lot of mine are YLI or KAO.
If you go on line and put "bunka thread" in your" search", you will find a lot of sources. The first one that came up for me this morning was YLI. I like their bunka and also their silk ribbon. This is not an ad. I am just saying that it is readily available and works for me. I have never ordered directly, but know some people that have and seem to be satisfied.
Anyway, go find some bunka and unravel it. That's the most fun part of the project. Watch it expand!
Thanks for the votes. Please do it again!
See you tomorrow with more curtains.
Subscribe to:
Posts (Atom)