Don't forget to poke the photos to enlarge!
Showing posts with label Tutorials. Show all posts

Wednesday, November 10, 2010

The Screening Process...

Today is Wednesday and on Wednesday, I am not great at working on long projects. Soooo.....
I decided to do a quick project that can be done many ways.

This process can be made into a triptych wall for display as I am doing it or it can be made much smaller for a three panel screen with different materials as a base.

I designed this one on graph paper this morning. I made it 6" wide and 8" tall at the highest point.

I drew out the center panel and put a curve at the top. You can make it symmetrical by simply folding the graph paper down the center and cutting the curve at the top for half. The sides should automatically match that way. Then simply use the half for the two side pieces.

For this wall sized unit, I used foam core for the back side and poster board for the front. That gives it stability to stand alone.

If I were making a three panel screen, I would use one illustration or mat board for the back and poster board for the front.

I cut out the three pieces of foam core and three of poster board and then found two fabrics that looked good together. I cut three pieces of each fabric with about 3/4" extra around the edges.

I used spray glue to adhere the fabric to the front and Aleene's gel glue to wrap the edges around to the back.

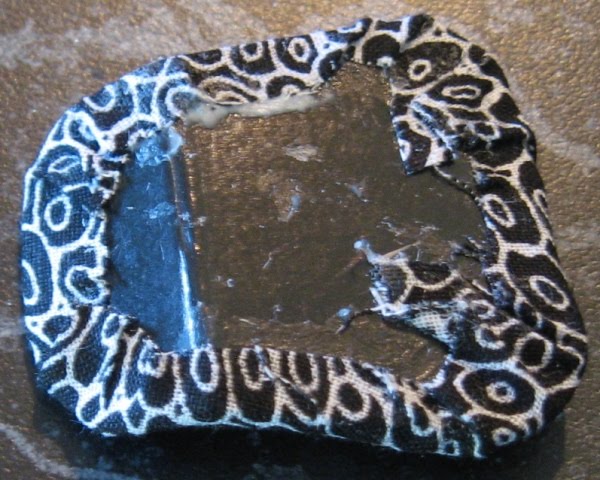
I mitered the corners of the fabric, making allowance for depth on the foam core and just cutting close to the corners on a slant on the poster board. Poke the photos to see better.

I laid the foam core pieces face down and lined them up, gluing lengths of ribbon to the seams. If you wanted a more solid look, you could use a strip of fabric instead.

Then I glued down the pieces of poster board on corresponding foam core pieces, sandwiching the ribbons in between.

I did have to weight these down with books just because I used Dollar Tree foam core. It is more warp-able than regular foam core.

When it was finished, Tessie volunteered to model for scale.

The nice thing about these little screens is, they can be set anywhere that you need a back drop for a couple of pieces of furniture. They also can be folded for storage. If you are planning to fold them, be sure to make the center front just a hair smaller than the back, so that it will close easily.

I got the idea for this from a needle book on one of the embroidery websites. Theirs had a neat tie closing on the center front. I eliminated that part and also the padding that they had on it.

It might be interesting to pad the outside and do the cover in patchwork or embroidery, but that's another story for another day.

I am off to Wednesday Witches' mini meeting soon.

See you tomorrow.

Thursday, November 4, 2010

No Apron Today.....

Early this morning, I went into the workroom and started looking for my Russian file folder.....It was at the bottom of a pile on the floor....No...Don't ask how the workroom looks now.

I knew that, if I wanted to do anything besides make zebra skin aprons, this morning I was going to have to start early.

I found what I was looking for. I remembered a photo of a trestle table on one of the pages. We needed a small table for the main part of the cottage.

I made it smaller and made it a bit more rustic. The one in the photo was much fancier than a cottage table.

Here's the pattern for it if you wish to try it. It is drawn on quarter inch graph paper. If you can get it to that size on your computer, you can just use the pattern as is.

The wood that I used was 3/32" thick bass. You need a 3" by 3 1/2" piece for the top, the two fancy end pieces, two stretcher bars that are 2 1/2" long and one for the mortise and tenon that is 2 1/2" plus a 1/4" to 1/2" tab on both ends. The strips were5/16" X3/32".


In order to get the ends to match, I took some double stick tape and stuck the two pieces together before cutting. That way the two pieces will be exactly the same and I only have to cut once.

The only other fussy cutting I had to do was whittling down the ends of the boards for the mortise and tenon join.

Speaking of that, to get the rectangular hole in the end pieces, I used my pin vise drill and drilled a hole in each end of the opening. Then I took an Exacto knife and cut out the rest.

The next step was to stain all of the pieces. This photo was after a golden pecan coat. I didn't like the color so I went over it with Early American Minwax....OK, so I couldn't find Early Russian. I don't think that Minwax makes that shade.


I stuck all of the pieces together with Fast Grab Aleene's glue. I put in the middle stretcher bar first, making sure that the end tabs were seated into the holes with a bit of glue. The bottom bar lays flat at the center bottom edge and the top one goes vertically at the top edge. I clamped them all together and let them dry.


The last step was to flip the top over on its face and center the leg assembly onto that with glue.

I was just sitting here watching the glue dry when Tessie zapped herself in, grabbed the table and zapped herself out again.


I have to go now to see where she hid the table. I still have to work on the finish.... As she left, I heard her growl...."No apron, NO TABLE!!!!"


See you tomorrow.

Thursday, October 28, 2010

Turn Off the Lights and Leave.....

I promised to show you how to do some basic tufting yesterday....Here we go!

I am redoing the mattress for the trundle bed.

I took apart the mattress and cut the block a bit smaller, so that I would have room for the blankets.

I cut a piece of card stock just a hair smaller than the block of wood.

Then I cut a piece of quad rule graph paper the same size for a pattern. I centered lines going in both directions so that the tufting pattern would also be centered. I drew dots in a diamond pattern.

You can do the dots in whatever pattern you want, but for the first time, I would recommend a square or diamond pattern.

I then laid the pattern on the card stock and punctured all of the dots with a crewel needle. It is easier to get the thread through all of the thicknesses of card stock, stuffing and fabric if you do this first and it makes following the pattern from the back that much easier too.

Next, with a double thread and starting in the center, I went up from the back through the center hole. I flipped the whole thing over and a few threads from the hole that I came up in, I poked the needle into the fabric and went back to the back. I needed to come back through the same hole that I started with.

Always start in the center and work out. You will find that the work lays a lot flatter and you can keep the fabric on the straight of grain with this method. If you start at one end, chances are you will be way off by the time that you get to the other end.

You should start with as long a double thread as you can manage. It is best to not have a lot of starts and stops on the back.

For the mattress, I didn't bother to do button tufting. If you want that effect, you can go back and do a French knot or a bead in the center of each tuft at this point.

The top still looks a bit rough. You will find that, when you stretch it around either the card stock itself or in the case of the mattress, around the block of wood, it will smooth out.

Before you turn the edges to the back, trim the batting even with the edge of the card stock.

When you stretch it, be sure to start in the center of all sides and work towards the corners.

If you are doing the top of a cushion, simply glue it around to the back of the card stock and then glue that to the block as I did in the cushion for the wicker chair. It gets more complicated if you are doing upholstery on a wing chair or couch. I won't go into that here.


For the bed, I simply glued it to the back of the block. As you can see, there is room all around the mattress to tuck things in.

As soon as I finished, I put the bed back in the cottage to see how it looked. Then I went and put everything away.

By the time I got back, Tessie and the mad pig had settled in under her quilt of choice.

I started to tip toe out, so a not to awaken them....Peace at last.....Then I heard a mumble,"Turn out the lights and leave....."

Then I heard two loud snores in unison. Who knew that pigs snore too?

See you tomorrow.

Wednesday, October 20, 2010

Don't Tell Tessie!!!

Yesterday, Tessie announced that she wanted a black wicker set especially for Halloween this year. Here we go again.....

There is a way to get around making everything that Tessie has on her list.

No. I didn't make that black wicker chair overnight. I found an old brown one that I wasn't using. Then I grabbed a can of flat black spray paint. Almost instant black wicker chair. Don't tell Tessie!!!

She told me that she didn't want matchy-matchy to the apron this time. She dragged out the tuffet that you see in the photo and asked, "May I have skeletons?"

Since I had lots and lots of skeleton fabric, I said "Yes. You may." and got started bright and early this morning.

I thought that I would show you how I make slip seats for the wicker. This is so that they can be changed, if I tire of one fabric and want another.

The first step is to cut out the shape of the cushion from 1/4" foam core and one from poster board also. Then I cut a long 1" strip that will fit around the foam core and one that is 1/2" larger all around than the poster board.

At the same time, since I knew that she would want a pillow, I cut two squares of poster board the size that I wanted the pillow and two pieces of fabric 1/2" larger than those also.

I cut two pieces of low loft batting the shape of the cushion and the same for the pillows.


Next, I clipped the edges of all of the material and mitered the corners so that everything would lay flat when I glued it to the bases.

Here you see the clipped pillow material and the other side glued down to the back.

The foam core piece gets centered on the fabric and glued around both the top and bottom.

The top of the cushion is clipped and glued to the back all around. If you need to, trim anything on the back that doesn't lay flat.

Then glue the top of the cushion to the foam core base and the two pieces of the pillow back to back. You can clamp this for a while if you aren't sure that it is going to lay flat.

The last thing to do is put cording or trim around the seams between the pieces. In this case, I used #5 pearl cotton.

I wouldn't let Tessie sit down until after the photo.

You simply slide the seat in and out as needed.

Tessie likes this particular chair because I wove a pocket in the left side as a place to stash her books and magazines.

I also put the same trim around the tuffet. Now all it needs is feet.....Did I mention that the feet are somewhere in the Black Hole of my workroom......?

Guess where I am going now? I have one end of the string tied around my ankle. Who has the other end of the string? Please tie it to the door handle. I'm goin' in!!!

With any luck, and a couple of good strong knots, I will see you tomorrow.

Monday, September 27, 2010

Four Legs and a Table Is Born......

Have I mentioned that I hate cleaning the workroom? Have I also mentioned that I will let any minor thing distract me from cleaning said workroom? I do... and I will.

Tessie and friends are still partying. They didn't invite me, so I am doing laundry and in between loads, cleaning the workroom.....Trying anyway.

As I was putting things away, I found an unopened package of four turned legs. I put them in the "wood to be put away" pile and went about my business.

Then I found an 8" length of molding. It also went into the "wood to be put away" pile.

It was fate. How could I fight it when I found a scrap of 3/32" bass wood just big enough for a table top, with just a smidgen of trimming.

So much for cleaning. I left the legs long. They were 2 1/2" to be specific. I took the eight inch piece of molding and cut it into four pieces. Two pieces were 2 3/4" long and two were 1 1/4" long.

I glued the legs and the molding together for the bottom of the table. I used the gluing jig to hold them in place until they were dry. Oh. I forgot to say that I stained all of the pieces before gluing.

I then cut a piece for the top that was 3 1/2" by 2". I sanded the top and rounded the top edges with an emery board. That was stained too.

When the bottom assembly was dry, I flipped the top on its front and clued the legs and skirt piece to the center back.

I then sprayed the whole thing with Deft semi gloss varnish.

I need to sand it and spray again. I thought that I would show you what it looks like now, because it is getting late.

I had to drag Tessie out of the party to pose with the table. She refused to let go of the half eaten pumpkin cookie. She said, "If I give you the cookie, you'll eat it. Stay away from my cookies!!!" So we took the photo, cookie and all.

I have to go back now and either sand and spray the table or clean the workroom some more.....Guess which activity I am voting for?

See you tomorrow.

Saturday, September 18, 2010

Chair Details, Part Two...

Continuing from yesterday's instructions, here we go again.

The first thing I did today was make a jig for the legs of the chair. In order to get them all the same, I took a small block of pine and drew a line 1 1/4" down from one edge. Then I pounded a large nail, the diameter that I wanted the bottom of the chair legs to be, into the wood just above the line.

It's not very scientific, but it works for me. I cut the wires just by eye to the length that I needed. They can be trimmed more later.

Probably about 3 to 3 1/2" would do it.

Then I wrapped the center of the wire around the nail and bent the ends flat over the edge of the wood block.

This next photo looks a bit messy. I did clean up the glue after I took it.

I cut two pieces of cardboard from a box that I had on hand. I used the bend in the box for the bend that I needed in the seat base.

I cut two of these. You have to do it to match your chair, so I just gave you some general measurements for mine. The widest part of the front is 1 1/8" wide. The depth to the fold was 3/4" and the flap was 1/2".

After the glue dries, you can manipulate the legs more and clean things up. I made the legs flair out more than they are in this photo.


Here is a photo of the chair with the base glued underneath. I have it clamped together for drying.

I cut a cardboard form for the seat. This was also cut from the bend in the box. I wanted a "contour" seat.


Here you can see the back and front view. I got the bend by putting two layers of thin batting on the front seat part and then covering the whole top surface with a third that went up the back bend.

Then I covered the whole thing with fabric, easing the corners into place without any folds. I am not sure why this photo turned out so small. Hopefully I will get large enough by poking....

Here's the finished chair. Please note that Zar has learned his lesson. If he sits on the sofa, there is still room for Tessie to sit there, if she so wishes, without zapping him into the next county.

Please ignore the overturned furniture in the kitchen. I think that is left over from the last time that Zar sat somewhere that he wasn't supposed to sit.

See you tomorrow.
Friday, September 17, 2010

Chair Details....Part One...

Last night I started another one of the chairs. This will be the official tutorial for them. Please give credit where credit is due on this one if you make it. It is an original. Thanks.

You will need a suitable bottle, extra hold, non aerosol, hairspray, needlepoint canvas(I used #14 for this one.) 26 gage annealed black steel wire and # 20 gage annealed black steel wire. You can get these at a hardware store. You will also need some light weight cardboard, Aleene's Fast Grab glue, spray paint in the color of your choice and lots of patience...

Tools will be Scissors, pencil, ruler, clips and wire cutters.

OK....The first step is finding the right bottle. I used a 1 liter Listerine bottle. Any bottle that is a good "seat" shape would work.

You have to look at this one sideways. The side of the bottle is the bottom of the seat and the bottom is the back of the seat.

I thoroughly saturated the canvas with water and then started stretching it around the bottom of the bottle, trying not to waste too much. What is left over can be wet again and made into baskets, so there really isn't much waste.

It takes a little time to stretch the canvas tight and work all of the creases to the outside of the rubber band. It can be done. Just keep at it. I found it much easier the second time. Keep in mind the grain of the canvas. My first chair was a bit off and even though it is straight, it looks a little tilted. I did the second one on the diagonal. It is harder to line up, but I think that this one turned out better.

After you get it smooth, spray it with extra hold hairspray. Let it dry thoroughly. I do it overnight.

After it is dry, measure up 1 1/2" from the side of the bottle and mark the arm. Measure 3" up and mark across the bottom for the top of the back.

Draw gentle curves at the corners. Ease the rubber band off and then the canvas. Be gentle.

Now, hold your tongue in the right place and start cutting. After you have cut out the shape that you marked.

I did some extra trimming here and there to get a shape that really pleased me.

Next, cut a piece of #26 wire that will more than fit around the edge of the chair. Starting at the center back, put a line of Fast Grab around the edge. Lay the wire about 1/16" away from the edge, following the contours of the chair. Now roll the edge with the glue on it around the wire and clamp. Do this all the way around, being careful not to pull the chair out of shape.

Have Tessie keep handing you clips, so that you won't have to stop the process in the middle.....Oops. I guess you will have to find someone where you are to do that job. Tessie says she can't possibly leave the new chairs unattended. Zar......

Now.....Sit back and relax. The glue has to dry. The chair will have to be spray painted the color of choice.

I have to go out for a while now.....Tomorrow I will give details on how to do the rest of the chair.....

See you then.

Thursday, September 9, 2010

Shelving 101

Nag! Nag! Nag! Tessie has been after me for the past 24 hours about the shelf unit in the bathroom. I finally gave in and made her one this morning.

Grab a 3/32" sheet and come along for the ride. I cut a back 2"X6". I cut two sides 1" X6". Then I cut four shelves 2" by 1"minus 3/32", 29/32" to be exact. That was to allow for the thickness of the back of the shelves.

I sanded all of the pieces, then marked the sides and backs for each shelf with a T square to make sure that the shelves would be level.

Then I cut a four long and eight short pieces of 1/16" square stock as shelf braces and glued them under the lines drawn on the sides and back.

Next, I used my handy dandy magnetic squaring jig from Micro Mark. This is the best investment that I ever made for making furniture. I glued the sides to the edges of the back and then before it was dry all the way, so that they could be adjusted, I put in the shelves. When those were dry, I put the top on. It is a piece that hangs over the edge of the front and sides by 1/16".

Here you can see the reinforcements holding the shelves. They will virtually disappear when the shelf is painted.

After it dried, I put on a couple of coats of light ivory Ceramcoat paint. Then I edged the shelves with scrap booking paper lace. This could be done with real lace also.


Tessie is now a happy camper. She has already loaded the shelves with towels and bottles of all kinds. She says that the frog on the second shelf used to be a handsome prince before he irritated her......

I am very close to being done with the workroom. I stuck the still at the back atop some tiles. We don't want to mess up the wood floors.

I am sure that, before it is all said and done, Tessie will rearrange the whole thing ten times, but for now, this is how it is going to look.

I am off to do other things now. The cats are yelling for food and I don't want to take the chance of letting Tessie feed them......

See you tomorrow.

Sunday, August 22, 2010

Frippery, Gewgaws and Triffles.....

I promised to show you how to make a silk carnation without a needle and thread. Here it is. All you do is cut a 2 to 3" piece of silk ribbon. Then you put a dot of glue on one end so the the threads won't come loose. On the other end, you work one thread out of one edge with a pair of tweezers or a needle....OK so there can be a needle involved, if need be. Then you simply pull on the thread until the silk gathers into a rosette(carnation). Put a small dot of glue on the back to keep the thread in place. Cut off thread and there you have it.

Another interesting thing with the ribbon is to pull both edge threads. This gives you ruching. With this, I sometimes simply start with the whole bolt of ribbon and just pull the two threads until I think that I have enough. Then I put a dot of glue at both ends and cut it off. If you need to cut it anyplace in the center, be sure to put a dot of glue on the edges before you cut. Otherwise, you will loose all of the pretty gathers. You can tape it or pin it to a board and play with the ruching until it pleases you. It can be glued to clothing or furniture as decoration. Once it is glued, don't expect to move the pleats. Do that before you attach them to your project.

Last but not least, bow tying can be a nuisance. I am sure that some of you have already heard about the pin method, but I will include it for people that haven't.


Enlarge the photo to see the steps better.

1. Put two pins in a pinboard as far apart as you want the finished bow. In this case, I did them 1/2" apart. Thread your ribbon on a tapestry needle. I find it easier to work with the needle than fighting the flimsy ribbon. Starting with the end of the ribbon at the bottom right, leaving a tail as long as you want the finished bow, pin it to the board. Then loop it around the top left pin, across the back and around the right pin, crossing over the first tail.

2. Bring the tapestry needle up and under the body of the bow, between the pins.

3. Pull the tail on the needle down over the top of the bow, keeping the ribbon tight.

4. Loop the needle under the first tail from left to right. Then bring the needle back over the top of the first tail and loop it under itself. Pull the two tails up tight and you have a perfect bow. If you need to make several bows the same size, this comes in handy.

Go get some silk ribbon and practice. Tessie is tied up right now....Literally. She says "Help!" and "Get me out of this mess!" I won't show you a photo of this. It would be cruel. I have to go unravel things now.

I will see you tomorrow.

Friday, August 6, 2010

I think I've Got It.....

As promised, I did the smaller "dome" this morning. I learned a lot and will correct the way I do it if I can find more of the vases at Dollar Tree.

The first thing I did was wrap a piece of computer paper around the top to make a pattern for a valence. I let it overlap by about a quarter of an inch. Drew a line to indicate the overlap and then folded the paper. I wanted six points, so I folded it in half, then in thirds. You could do any kind of a design on the bottom edge.

I cut that out and made sure that it fit. Then I Wonder Under-ed two layers of the fabric together and traced the pattern onto that. I cut it out and made sure that it fit again. Then I cut one circle of fabric the inside circumference of the vase and one the outside circumference. These were also Wonder Under-ed.

I glued the inner circle in place. Then I wrapped the valence around the vase and clipped the top in Vs so that it would lap over the top to glue. It all fit. I glued that down.

Then I glued the outer circle on top. Next time I will make a decision about the trim that I am going to use and glue it onto the pieces before I stick everything together. I was getting dizzy just trying to twist and turn the vase to get everything stuck to the valence. Mistake #1.

Sorry there aren't more photos of the process. It is hard to glue and take pics at the same time....Especially when your hands are glued to some part of the thing that you are trying to photograph... Mistake # 2.

The base is done the same way as the larger one. A circle of foam core was cut to fit inside with a bit of extra space for the carpeting. The carpeting was glued around it and then the whole thing was glued to the base, so that the dome sits around it.


If I do this again, I will make the valence shorter. It is hard to see Tessie without getting down to eye level with her. Mistake # 3.

My last mistake was trying to talk Cordelia into posing....She is much smarter than Tessie. She claimed that she had no idea how to do it and needed someone to show her....Yup. Tessie volunteered.

I should have just asked Tessie in the first place. Now she has both Cordy and Zar pointing and laughing. She swore up and down that she was never getting under a dome again.....There she is.....I wonder how long it will take her to realize that her zapping powers are back....She hasn't used them for a week! When she figures it out, I wouldn't want to be the two on the outside.

Maybe I should go play hero and rescue her before she does something she shouldn't.

See you tomorrow.

Thursday, July 22, 2010

Little Miss Muffet.....AKA Tessie's Tuffets

You may have noticed in some of the houses and scenes, there are little tuffets here and there.

I designed these a few years ago. I was wandering through Michael's one day, looking at all of the unfinished wood pieces. I saw these wheels that are meant for toys. On impulse, I bought a bag and took them home to experiment.

The tuffets were the result. The ones with the craziest fabric are the ones that were most popular at shows.

Anyway, I thought that you might like to try making your very own tuffet.

You need one wheel, some index card, a bit of bonded batting for the top, and a small piece of each of two co-ordinating fabrics and three beads for feet.

The first fabric has to be a strip long enough to fit around the wheel and overlap a bit. The second only has to cover the top and bottom circles and wrap around to the back.

The wheel that Tessie is working on is what the finished wheel should look like.

The top and bottom index card pieces, in this case were 1 1/4" diameter. Be sure to check the wheel that you use for size.

The top round should have a piece of batting cut to size. That is glued to the card with just a dab of glue to hold it whilst you wrap the fabric to the back. Clip with little Vs before wrapping to eliminate excess fabric. The bottom piece is done the same way without the batting.

If you want the top padded part to look tufted, simply sew a bead to the center pulling tightly.

Next, glue the top and bottom pieces to the wheel on opposite sides. I whip stitch them as an extra measure to be sure that they lay flat.

Then you put a trim of bunka or other cording around the top and bottom edges. Glue the three beads in an equilateral triangle on the bottom. There you have it.


The one that I did today was a double. It was an experiment to see if it would look like an old fashioned hassock. I simply glued two of the wheels together after they were covered.

I left the feet off of that one. As I remember, hassocks never had feet.

Tessie took possession as soon as it was finished and declared it suitable for eating strawberry pudding. She had four words for the traditional food, eaten whilst sitting on a tuffet. "Curds and whey? YUCK!"

She made me promise not to make a tuffet for Cordelia. She appears to have a jealousy thing going for Cordelia right now. I said that I wouldn't make her one......I didn't tell her that Cordelia already has one in her living room and one in the sewing loft. I didn't want to get anything started.

Tessie is already complaining that there is too much lace on her new clothes....Who was it that wanted more lace than Cordelia? I am not going to bring that up either. She is in an argumentative mood this morning. I am staying out of her way.

I noticed yesterday that all of the entries with Tessie aren't labeled in the list. I am going to have to go back and re label everything more accurately. Somehow that doesn't sound like fun.

Maybe I will just go make another tuffet instead.

See you tomorrow.

Monday, July 12, 2010

How NOT to Test A Wall Color.....

When a color doesn't look right after the first couple of inches..... Don't keep painting!

I kept telling myself to stop on the left side of me and telling myself to keep going on the right side where the paintbrush was...The right side won.

See that color in the corner of the walls? That is the color that the whole thing was, but much brighter, if possible.

I was thinking lime green.....The brush was painting something that looked closer to Kelly green.

I walked away from it for a few minutes and went to work on the chairs that I started yesterday. Big Mistake! Big!!!

When I got back, most of the paint had dried and I had to take it off with hot water. I didn't get it all off, but enough so that I can paint over it. It would have taken twenty coats if I had left it the color that it was.

I thought that lime green, being a good sixties color, would work with the black and white. Being at the far side of the house, I was thinking that it wouldn't be all that noticeable....Wrong! It was hideous! Thank goodness, I didn't paint the whole kitchen.

I might still try a lighter shade of lime green, but no way, no how is it going to be the "Lime Green" that I bought.

I finished up the two other chairs and put white piping around the edges of the cushions. I used #5 pearl cotton to do it.

Tessie is very happy with the new chairs. I may not have to buy any other ones.

Now all I need is a table. It's a good thing that Tessie is the owner of the tea shop. When I finished the chairs, she zapped one of the tables from the shop into the workroom(cupcakes and all) to see how it would look, size wise, with the chairs.

Actually, I think it was just time for a cupcake break and an excuse to sit down and put her feet up.

Whatever the reason, that didn't help with assessing the size. We had to move it out to the townhouse to see how it fit.

I think that the size is pretty close to perfect. It has to sit in the bay. The other walls of the kitchen are going to be filled with cabinets and appliances.

You can see, on the wall, the paper that I was going to use in the kitchen in the first place. It's black and white, but it just doesn't say "sixties" to me. It's just plain boring.....

Maybe I should go through some of my fabric stash again. All I know is, lime green is OUT.

See you tomorrow.

Sunday, July 11, 2010

Have a Chair....

I have been trying to decide what kind of chairs I want in the kitchen. Until I make that decision, I am going to throw together three skirted Parson's chairs. Come along and I will show you how.

This is a very simple design that I first made in quarter inch scale, years ago. I figured that it could be made in one inch scale just as easily.

The first picture is the only pattern that you really need.

I use balsa wood as a base for the seat. It will never be seen, so why go to the trouble of making legs?

I cut two seat shapes from 1/2" thick balsa and two from 1/4" for each chair. Then one of that shape from index card.

I cut a piece of illustration board the shape of the bottom two thirds of the back pattern. Then a whole shape of the back pattern from index card.

You will need enough fabric to cover around the base, the seat cushion and the back. You will also need a couple of small pieces of bonded batting for the seat cushion and the back.

I cut the balsa pieces on the scroll saw.

I glued two of the half inch pieces together and a quarter inch piece on top of that. The other quarter inch piece will be the cushion.

First I covered the base with the seam in the back. Then I cut pieces out of the corners and glued them to the top and bottom.

I did the same thing with the seat piece.

Then I cut pieces of index card just a tiny bit smaller than the front and sides of the chair and covered them with fabric, leaving the top side loose to glue to the top of the block.

After those were glued on the front and sides, I cut a piece of index card for the cushion. I padded it with the batting. Then I covered that with fabric and glued it to the top of the cushion.

I glued that part to the balsa form for the cushion.

I covered the illustration board with fabric all around the edges.

I covered the top third of the index card piece with batting. Then I wrapped the index card back piece with fabric, gluing as I went. I cut a miter in the corner of all pieces to eliminate bulk.

Here you see the assembly of the back. The illustration board is to give it some body. The index card simply is glued to match on the back.

When you glue on the skirt and back piece, leave a 1/4" margin unglued on the sides and bottom. that way you can make the pleated corners flair out a bit when you are finished.

The last step is to glue the back of the chair to the base at the back.

I haven't done any trim on this chair so far. I will wait until I have all three done. I can't decide if I want white, black or a contrasting color. Neither can Tessie.

As usual, I am being accused of cruel and unusual punishment....."Finally! I have a place to set down in the kitchen. I have been standing for months!"

The drama of it all!

See you tomorrow with finished chairs.