
This is the pallet that I used. If I were going for gray rocks, I would have Ceramcoat Hippo Gray on there too.
Since I am going for rocks that are from the same quarry as the chimney stones, I used Trail Tan for my base coat instead.
My pallet is, from the Antique White at the top, clockwise, burnt sienna, trail tan, Wedgwood green, red iron oxide, and charcoal.
They are all Ceramcoat. That's the paint that I use most. Better coverage than most.
The only paint that I use straight out of the bottle in color is the base coat. I still added a little water....Needless to say, a little thicker where the writing was on the egg carton.
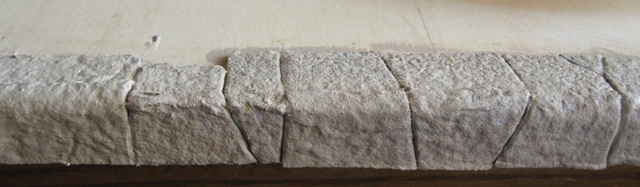
I painted an area about 8" long. I don't want to do it all at once, because I want to work in the wet paint. It blends better that way.
As you can see from the pallet, the rest of the colors are a free for all. I keep putting more color on the brush without rinsing.


I mentioned my most important tool in the title of the post....
If you are squeamish and don't like to get your fingers in the paint, don't look at the last photo!
Of course you could use a paper towel or tissue to dab at the wet paint, but the secret is, the fingers can get into places where towels and tissues can't. And fingers don't steal paint from the surface like absorbent towels or tissues. You need to keep the moisture on the wall, not take it off.
Hey! It's acrylic paint. It comes off with soap and water! No problem.
Basically, all I can tell you is, I go at it as if I were doing a painting of a wall. Add the colors a soupy wash at first and sparingly. It's better to apply too little and build up than it is to get it too wet and have to wait to do more.
The last color to go on the brush is the antique white. Again, I don't rinse the brush. That way you aren't getting glaring white. You are just getting a hint of highlight. It is like the sun is shining and the highlights are just barely touching the outer bits of rock...I do use the fingers on this too, but lightly.
By the way, I don't use straight black. I use charcoal because it is easier to blend in with the other colors and doesn't get as muddy as black does when you blend it. It's just a personal quirk. You can use black if you want to. As far as that goes, you can use any colors that you like.
The best way to decide what colors you want to use is to find a photo of stonework that you like and try to analyze what colors are in the rocks.
On the chimney that I showed you yesterday, I went a step further and did charcoal washes in all of the places where the serpentine stones go up the side. I did if very sparingly and very weak, but it makes the serpentine design stand out a bit more.
OK. Now it's your turn! Have fun!
See you tomorrow.
3 comments:
Thanks so much Casey. It looks so much better when you do it. I used your technique on a little scene I did in a cup & saucer but I didn't know what colours to use. It came out pretty good but I think your colour combinations will work better for me next time. You've taught me so much! - Marilyn
Hello Casey,
Thanks for the tips. Your stonework is just wonderful and very relaistic.
Big hug,
Giac
I'm back again to see how you colored your rocks. :D
I knew that Trail Tan was a good color to have on hand!
Post a Comment