Minka asked where I got the fabric for the pavilion. Unfortunately I purchased it several years ago at our Walmart. Ours used to have the best selection of fabric, bar none. The lady that was the head of the department found access to mill ends from some of the great quilting companies and we were getting fantastic fabric for 2.00 a yard! No more. Don't get me started on the sad state of things in the Walmart sewing section now. I firmly believe that they are trying really hard to eliminate it all together. It is down to two aisles about 30 feet long now.
 It used to be a huge section in one corner of the store, along with crafts. Oops...Off subject.
Unfortunately, that particular fabric had no information on the selvage edge, so I can't pass along any information. Sorry Minka.
Kathi, made the comment that she would like to make an awning on her "grandma's attic" project.
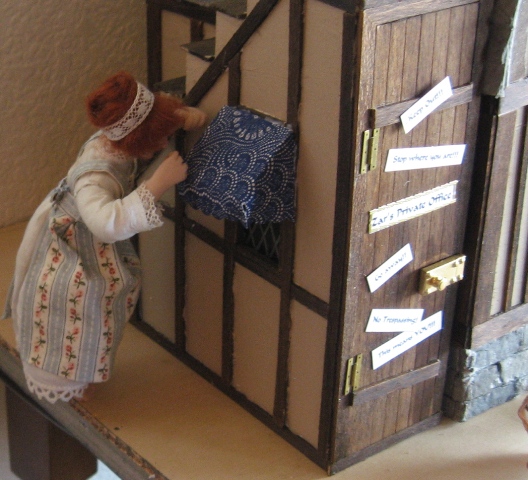
I realized that I had never shown my lazy way of doing awnings. Some people go to the trouble of building wooden frames and stretching fabric from one side to the other... Me? I take some illustration board or mat board and cut three pieces....One for the front and two for the ends. The front is the width of the window frame and as long as you want it to stick out from the window. The ends are a triangle with the longest side the same as one side of the middle section. The short sides of the triangle are a right angle from the wall to the end of the awning front and at whatever angle you want the awning to be.
Other than that, all you need is some scraps of fabric, large enough to cover the awning and hang over a bit on the bottom edge.
I glue the three pieces together to make sure that the awning is at the right angle and large enough to cover the top of the window, but not too large.

By now you have probably guessed that this is not an exact science.
Since I was using a patterned fabric, I could just wrap it around in one piece. If I were using stripes, I would cover the ends, going up and down and then the center section separately.
A good trick is to cut the front and side edges with fancy scissors. Make sure that they will work on the fabric first. I used Fiscars scalloped pinking shears. Some of the paper trimmers won't cut fabric at all.
One way you can sometimes get around this is, first coat the back of the fabric with white glue and let it dry. That makes it easier to cut....You will just have to experiment with that part.
You can also draw a pattern on the back of the material and cut it out with regular straight scissors.

After you get the front edges the way you want them, simply trim the back edges flush with the board.
I told Tessie that they were to shade her eyes...She took me literally and plopped one on her head and then started complaining loudly that she couldn't see with it on....
I put one on the bathroom window and Tessie announced,
"I still can't see in very well. Could you make the glass clearer while you're at it?"
I don't think that is a good idea....

I put the other one on the bedroom window. I didn't put any trim on them, but you could if you wanted to go to the trouble.
I am going back to the pavilion now....No more sidetracking until I finish it.
See you tomorrow.
4 comments:
Fantastic! I like it.
Bye Faby
Thanks for the awning tips! You make it look easy. :D Tessie looks really funny wearing hers.
Great Tutorial :)
Marisa XXXOOO
That fabric is a really pretty. Walmart is the last place on earth I'd expect to find fabric much less beautiful stuff! Sounds like it was a very good thing while it lasted. BTW, nice awnings!
Post a Comment