Don't forget to poke the photos to enlarge!
Showing posts with label patterns. Show all posts

Friday, June 6, 2014

And Then the Six Year Old Wandered in Behind Tessie....

Everything was going fine with the cleaning, until Tessie mentioned that she hated plastic drawers... And wanted to do something about it...

Please stop reading now, if you don't want to get involved in dressing up drawers....
OK.  I was bored.  I was already in six year old mode.(For those of you that don't know...I sometimes have the 20 minute attention span of a six year old when I have to clean the workroom.) So I went along with the plan...

First we had to have a pattern.  I took a sheet of heavy scrapbooking paper and laid it against the drawer fronts. I creased the paper with my fingernails and then cut them out a bit outside those creases, to make allowance for adjustment.

Most of the drawers are the same around the handle area, but of different depths. All I needed was the lines of the handles that stick out  on top and a fold under at the edge.

That's the top pattern.  The bottom had to follow the fold lines and overlap the top.  It also needed an area to cover the back wall of the handle.

After a lot of trial and error, I had a pattern to work with.

I did the top drawer with scrapbooking paper that was cardstock weight and used spray glue....It was just a bit heavy and stiff. It did turn out well, but it wasn't quite wide enough, so I had to put strips along each side to cover the whole drawer front. My motto is "Whatever works!"
I used a kitchen label that I got at Walmart, in the office supplies,  because it was brown instead of that icky white that the label maker spits out.  I did try the clear, but that was even worse.  I couldn't read the labels from across the room, because of what was underneath them.

Anyway, I remembered that I used to use the old starch trick to trim cabinets.  It works like a charm to stick fabric on wood.  It can later be removed by just peeling back a corner and pulling. Not so much on plastic.  I think that after it dries, it is going to let loose.

I do like the look of the fabric though.  I may have to try some of the repositionable E-6000 and see what happens.

I probably could sand all the drawers, but I don't want to do that.

I just went and stuck some of the repositionable glue under one corner of the fabric to see what happens... This is going to be an ongoing experiment.  I don't want to use white glue.  Too hard to take off if I tire of the look.

Tomorrow I will have an answer on the fabric covered drawer...I hope.  See you then.

Thursday, August 22, 2013

Taking Steps to Making Steps...

 First of all, Tessie informed me that she did not intend to climb over a foot to get from the pit to the stairs and fireplace.  So...I made a step

I used the end of the piece that I cut out for the pit. Perfect fit.

Then I added a half inch scored strip and a brace for the back.
Next, she informed me,  "The bench seating is way too hard!  I need padding.  I'm delicate."

I tried hard not to let her see me laughing...That was difficult.  More so than making a pattern for the seating.

I took a couple of sheets of computer paper and joined them together with my snazzy new cellophane tape.  Thanks to Dollar Tree.  Two rolls for a dollar.  I put three strips on the front and one across the back where I knew that I would be cutting.

Then I laid the larger sheet across the area that needed to be padded.  I traced the ends and then ran my finger along the edge of the seating area to make a crease.  That is more accurate than trying to trace it with a pencil.
I cut it out and tried it on for size.  It worked.

Now for the stairs. I had to scale them down some from the original.  That is, the length of the staircase is shorter, but I did manage to get it in after the third try.

We won't talk about the first one where I started at the bottom and worked my way up....Wrong bottom.  That piece goes all the way to the floor of the box for stability.

You can't see it in the photo, but the wall is two thicknesses of foam core above the floor where the bookcases will go.  That is also for stability. It hangs over the lip of the floor.

After that, I went back and drew a line where the top of the pit meets the base and the top of the stairs meets the next floor.

I am undecided.  The photo of the real one shows a turn at the top and the last step is actually facing the rest of the room...  A chunk is cut out of the floor for the last step. I drew it both ways and will see which looks best when I get some of the pieces cut.  Either way, there will be a wall about where Spike is sitting.  It is six of one and half a dozen of the other.  I will just have to wait and see which I like best...

Have you noticed a change in attitude with Tessie?  Yup.  She wants it. 

I am thinking that it would better suit Zar.  He is the one with all the books and interest in computers and other gadgets.  Speaking of Zar....Has anybody seen him since yesterday? He seems to have disappeared again...I do hope that Tessie isn't up to her old tricks.

Just because he is missing, doesn't mean that he is not eligible for ownership.  "Did you hear that Tessie?  Tessie?  Where are you?"

Maybe she went to let Zar out of the closet.  I should go look.

See you tomorrow.

Saturday, September 8, 2012

Weaving and Stitching...

This isn't finished yet, but Tessie insisted on showing you what I have done so far.

I got up this morning with the intention of doing all of the housework that I missed out on for the last four days....I got the kitchen floor mopped and a few other things cleaned up, but I didn't last all that long. 

I am still having twinges in my neck.  I don't want to have the pain come back, so I used that as an excuse to quit.

I have decided that, since this is Saturday and tomorrow's Sunday, I am going to pretend that the week is finished and just start over on Monday.

Please notice that Tessie changed into a more colorful apron after reading yesterday's post.  I am really happy that a lot of you agreed with me about the latest non color trend.  Maybe the pendulum will start swinging back towards the more colorful now...I don't think that they can go any further this way, unless they make everything transparent.  Have you noticed that the only prints they are using are one solid color mixed with white in geometric patterns?....That's another thing that is annoying me this year.

Since I am sitting the rest of the day out, I got out the old laptop and designed a rug to keep you busy.

Pretty simple.  I used two shades of green, two shades of mauve, light yellow, beige and Perle gray for the background.  The solid borders are a mocha brown.

As usual, it is an original design, not to be resold.  Personal use only please.

I am going to spend the rest of the afternoon working on a needlepoint caddy for my remotes.  I have a very large one for the TV, that I have to use to get the Apple box turned on...A tiny little apple remote that I am always losing.  I am going to try to combine the two in one case to keep them together.

It seems like I waste a lot of time searching for the small one.  Maybe this will solve the problem.

See you tomorrow.

Saturday, August 25, 2012

Tessie's Little Helper.....

This morning I decided to get back to work on the Weaver's Workshop/Furniture Workshop.

I drew up plans for an open cupboard for Zar to use in the woodworking shop, downstairs.

By the way, if you look closely, you will see that I left out the over all height measurement.  It is 6 1/2" tall.  You can also count squares.  Each is a quarter inch.

You can easily cut this out of a 3/32" slab of lumber and have lots left over.

I butted all of the pieces against one another.  That way there is not much waste in the wood.

Of course, Tessie's favorite assistant wanted in on the project.  He adamantly refused to get off of the graph paper, until we said he could stay and watch.

He is now helping me type this.  I don't think that he is so interested in minis, as he is in the fact that lunch will happen soon...


After I cut all of the pieces from cherry wood, Zar and Tessie took over and pushed and pulled the pieces into some semblance of order.

That was the dry fitting.  I did need to do a bit of sanding here and there.

I helped with the gluing and clamping.  There were so many things to hold together at once that we had to resort to extra clamps.
I don't plan to put any finish, other than lemon oil on this one.  After all, this is a piece for a workshop...Or another workshop.

Right now they are fighting over who will get the piece.  Tessie wants it to put unspecified "stuff" in for the weaving studio.  Zar wants it for unspecified other "stuff" in the woodworking shop...

This could go on for hours.  I am not getting in the middle.  Neither is Widget.  We are both tiptoeing away quietly...We are going to fight over what is for lunch instead.

He wants lobster, I want a Rubin from Arby's.

I am bigger than he is!  I win!  Rubin it is, as soon as Walter gets home with it.

Hopefully the argument in the other room, that is getting louder by the minute, won't come to blows.

See you tomorrow.

Thursday, March 1, 2012

Little Boxes....

That's what all of the cornices start out with. Basically a top, two sides and a front. That's all there is to it.

I drew up four on a page. They are all five inches wide. That's the width that I decided upon for the shadowboxes. I am not going to use all of them, but I thought that some of you might like to try it and these would be easy to enlarge and copy.

They are on quarter inch graph paper, so you will be able to tell if you are getting them right.

The sides and back are simply 1/2" by whatever length is called for. In this case, the top will be 5". The sides 1 1/2" or 1 1/4" for the second one down.

I am not going to do all of them, because I want to do some swag curtains in some of the boxes too.

Be aware that most of the cornices can be turned into lambrequins just by adding length to the side fronts. usually 3/4" will suffice.

This one is the one that I plan on using for the shadow box. It also has all of the measurements for you to copy if need be.

Tessie is already choosing fabric. I stick it in the box, folded lengthwise to see how the scale works. This one seems to be OK.

The boxes come with a black velvet lining. I keep looking at it and wondering if I should just leave that and let the curtains be the center of attention. I probably won't be able to leave well enough alone....

As I go along, I thought that you might like the information on more of the reference books that I use a lot. I like to rely on originals from that period that I am doing if I can.

These two are a couple of American photograph books that I use a lot. The photos in both are around or before 1900.

Both are books that I have had for at least 25 years and both well used.

The New York Interiors one is a Dover book.

The Tasteful Interlude is from Praeger Publishers, Inc.. I ordered this one from Alibris.com. I loaned out my first copy and it disappeared....You know how that is.

Dover may still be publishing the first one.

They are both full of wonderful photos. The first is all the New York area, but Tasteful Interlude is from all over the US.

I will be back tomorrow with instructions and the finished boxes for the first two...I hope.

Again, thanks for all of the support in the voting for mini blog of the year. I was even ahead for a while this morning. Tessie did a dance when she saw that! Keep up the good work. It keeps Tessie quiet and happy....

See you tomorrow.

Saturday, February 11, 2012

Rug Tangle....

This is as far as I got yesterday on the rug. I am experimenting as I go. When I put the needle down, Tessie takes over.

I have torn out almost as much as I have put in, stitch wise.I took a break this morning and did one the easy way.

I thought that you might like to play with the pattern.This one is 100, by 70. Only 7,000 stitches....

It will at least give you some idea of how to go about tangling. Take the pattern and play with it. Make it your own with different colors and rearranging the elements. Have fun. That's the important part.

This one is really simple. You can do it on any size fabric. It will look better in cross stitch than in needlepoint. That way all of the lines will connect and make sense.

I might just have to have a go at it myself. I don't even want to think about how many stitches are in the one that I am doing ad lib.

Back to work now.

See you tomorrow.

Tuesday, January 10, 2012

Cutting a Rug.....

We got the townhouse back to its proper place in the family room this morning. Now I can get back to work.

I decided that, for the three or four people in the world that aren't familiar with making a pattern for a wall or floor covering the easy way, I would demonstrate.

With a little bit of help from my friends, I started laying out the pattern for the bedroom wall to wall carpeting.

I armed myself with a stack of fresh computer paper, a pencil(It doesn't have to have lead.), a pair of scissors and some scotch tape.

Starting on the farthest wall, I centered it in the front bay. I pushed it up into the bay, against the wall, with the corners curving up.

Then Tessie ran her pencil along the wall to crease the paper, so that it would fit in the bay exactly. Hold onto the paper whilst doing this so that it doesn't slip.

With that one cut and laid in place, we kept adding sheets, overlapping as we progressed. We taped each sheet to the one under it to keep it in place.

We simply kept going until the entire floor was covered.

When we got to the edge, we creased it and cut it off.

I took over and pinned the pattern to the fabric at about six inch intervals along the edges so that it wouldn't shift while I was cutting off the excess.

I cut it with regular sewing shears. The longer the blade the better for cutting straight lines.


I laid it back in for a dry fitting. It fits.

I am not going to install it until the windows at the back are in place and their frames are on...I may even finish the curtains first.

As soon as I got it in place, Tessie had to see the trim against it.

The photo is a bit strange. The carpet is actually a couple shades darker than the paint...

When I get to laying the carpet, I will use Yes Glue. I will paint it on the floor with a brush and then put the carpet over it. Again, I will start at the back and work my way towards myself.

This same pattern method can be used for walls(wallpaper patterns). It works for any kind of material, fabric or paper.

That's enough of this for now. I am going to go trim out the windows.

See you tomorrow.

Saturday, June 25, 2011

Playing...Don't Nag...I'll work Tomorrow.

I am taking the day off to play on the computer. I finished the coloring on the roof yesterday. Zar and Tessie have their heads together, planning interior decor now.

If they can take the day off, so can I. At least some of you(needle workers in miniature) may benefit from it.

I started playing on the laptop and decided to do some rug designing. You will have to poke the photo to get a better look. It is an original design, so as usual, personal use only please. For fun, not profit.


The rug is 99 stitches by 151. If you do it on #22 hardanger you will get a rug about 4" by 7". If you use finer canvas, it will be smaller, if coarser canvas, it will be larger.

It is a simple rug with two colors of pink for the flowers, one color of green for the stems and leaves, some gold dots here and there, dark blue,and a cream background for the rest. Six colors in all.

I will probably do it on #24 congress cloth. That is my usual weapon of choice. This will not go in the trailer, so I probably won't start it for a while.

I just thought that you might want something to do whilst I was messing around today. I promise to go back to work tomorrow. Honest.

See you then.

Wednesday, April 20, 2011

Back to the Basics.....

Yesterday afternoon, Tessie announced that she needed a shelf in the workroom for her new TV. Mind you, all the TV produces is static and snow, but she has hopes for a satellite or cable hook up, so that she can watch Twilight Zone and The Gate.....It's another one of those "Hold your breath and wait." situations.


I humored her and made her a simple 4 board shelf to fit the TV. It's beginner stuff, but always handy to have in your book of tricks.


I used 3/32 walnut board to do it. You can use any wood or thickness. This is my personal preference. With walnut, it's not necessary to stain. I simply finished with Deft spray satin acrylic varnish. A couple of coats, with sanding between does the trick. This isn't going to be a show piece. Most people won't even notice it is there.

You can adjust this pattern to whatever size shelf you need. And you can change the shape of the boards to make it a fancier shelf.

The method is cut out the pieces by whatever means. I have done these with anything from an Exacto knife to a scroll saw. They are very simple and no trouble to cut.

Sand the pieces. To put them together, You lay the shelf face down and center the long edge of the back support on the back edge of the shelf. You then glue that and the two side supports together. Let them dry well, varnish and you are basically done.

Tessie is pleased. Zar, not so much. He says that the screen is so small that he needs his binoculars to see the picture from where he is sitting.

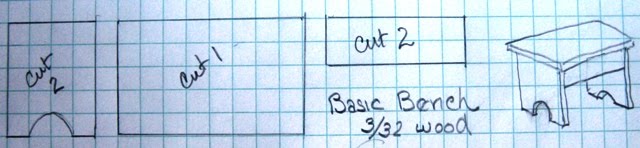
He dragged a small 5 board stool out, as close as he could without being in kicking range of Tessie's feet. Whilst he is sitting there, I may as well give you a pattern for that also. It's another simple but handy pattern.


The same instructions for cutting and sanding work for this pattern.

When you go to put it together, a gluing jig is handy. You want to get the four bottom pieces square. You do this part first, upside down. The two support pieces go between the leg ends. Then when that is dry you simply center the top and glue it on. This can be finished any way that you like. The one that Zar is sitting on is simply painted.


This pattern can also be adjusted to different sizes. The ones on the porch of Hubert's Haberdashery are the same pattern, but stretched to six inches. For those, I painted and distressed the bottom and stained the top.


Keep in mind, if you are wanting seating, the bench should be between 1 1/4 and 1 1/2 inches high. In real life that would be between 15 and 18 inches high. That is standard seating height.


If you just want a step stool, it should be more like 3/4" to 1".


Everything was right in the world. Tessie and Zar, sitting peacefully on the bench together, above my head.....Until Tessie borrowed the binoculars, pointed them at me and said, "OK. Now. We finished the shelf in the workroom.....We need kitchen shelves, closet shelves, book shelves in the living room and a bench for the entryway of the townhouse. No more fooling around! I want my house finished! NOW!"


Did I say that it was a simple project? Oops! Not when it involves that many shelves!


See you tomorrow.

Saturday, July 3, 2010

Excuses. Excuses. Excuses.....

OK. So I didn't really get anything done again today. We went to a movie and lunch. That's my excuse and I'm sticking with it.

I did some more sorting in the notebook after we returned. I found several things, probably of no interest to anybody but me. It is kind of like looking through a diary and remembering what you did on a certain date....Or wondering why you did a certain thing that, at the time, you thought was note worthy. Now it's not.

For instance. This pattern for a cradle. I don't remember what antique book I found it in. At the time I must have thought that it would make an interesting miniature piece. Why didn't I write down the date and some information about the original? Now if I do make it, I have no idea where it is from or what the date of the original piece was.....Somebody slap me!

I may just make it anyway. If you feel like grabbing the pattern and making one, go for it. The top portion of the cradle sits on the bottom with a lip around the edge, so it should be easy enough to put together. The ends appear to fit between the sides and the bottom rockers sit two inches apart with a brace on the center bottom. I would build it out of 1/16" thick lumber.

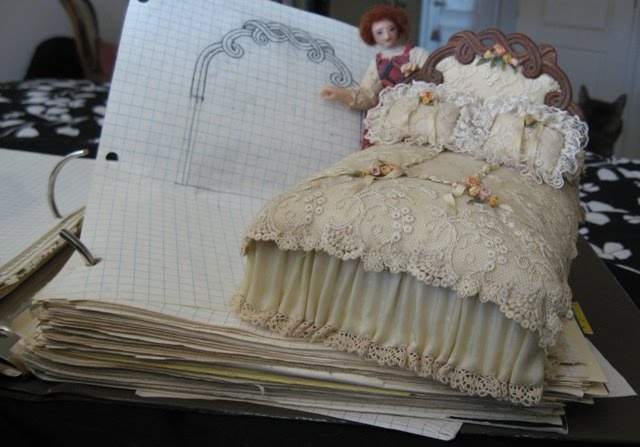
The next thing I found was the original pattern for the headboard of bed #5. In answer to your next question. Yes. That is all I start with. It's a drawing of the exact size that the headboard is going to be when finished. The rest of the bed comes out of my head as I work. This bed is, for some reason, my all time favorite. I couldn't part with the hand made, antique French, needle lace on the surface of the spread.

The last thing that I found was my very first drawing of the fairy tale castle.


When I first started it, I was going to do it in the round...All four sides were to have rooms. Then I realized that, to display it in our house, it would have to sit in the middle of a room. Not feasible. I kept messing around with it until it evolved into what you see elsewhere on t he blog. It is more of a three sided arrangement, but really only one layer of rooms.

I still kind of like this plan, but as I said...Not feasible for our house. Too bad.

The reason that I am quiting for the day is....Tessie showed up and spied the plans for the castle. She immediately announced, "If you can make that big old castle up on the shelf, you can make one for me. The townhouse is NOT Spiderwort Manor! It is just a townhouse. I will live in it for the time being.....but....."

I am living in fear of the time when the townhouse is finished.......I am going to go put in earplugs and knit socks for a while now.....Not Spiderwort Manor????

See you tomorrow.

Friday, July 2, 2010

The Big Book of Little Things.......

We had to take Mookie back to the vet today for a check on how his thyroid is doing....We won't know the results of the blood test for a few days, but if I were to guess, I would say that he is doing great. He went from 5 to 6 pounds in a month and is still eating like a pig instead of a cat.

Anyway, as a result, there was a bit of a chunk cut out of the middle of the morning. When he got home he was at first acting like he was mad at the world. A little later he went through the denial stage.....He kept running around the house trying to figure out if the morning trip was real or just a dream. After about an hour, he calmed down and pretty much decided that it never happened. At least he didn't draw blood from the assistant's hand this time.

I decided that, since the morning was mostly a thing of the past, I might as well do something silly for the rest of it. I was trying to think of something to do for the blog. My eyes landed on one of my favorite things. It is a huge notebook full of sketches for projects, furniture and various lists.

I started it over 25 years ago when I was doing mini shows. I keep everything.....Not necessarily neatly and in order, but the notebook keeps getting thicker.

I noticed that some of the drawings on graph paper were no longer on graph paper. The lines are gone! Obviously not archival.

I thought that it might be fun to show you some of the original sketches for projects.

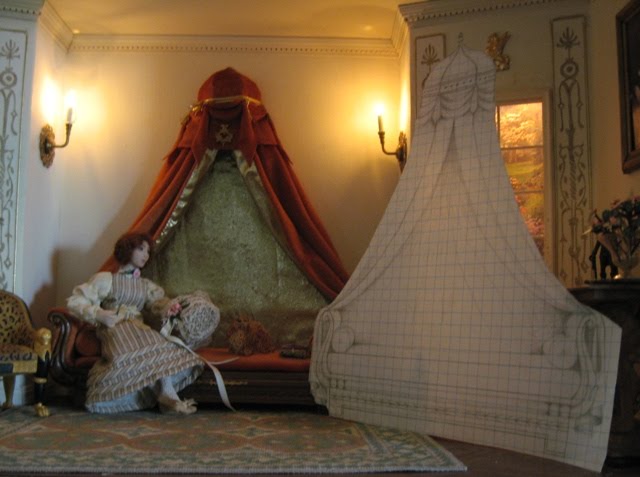
This first one is the sketch for the draped sofa in the Regency room. This room went to the Anaheim NAME show in the early 80s. This was one of the first projects for which I kept sketches. The sofa was a direct copy of a sofa in an antique furniture book. They gave the measurements of the original sofa, so it was pretty easy to draft a pattern for it.

The next one is of the table in the Southwestern Room Box. That one, I cheated on a bit. The table top is the original shape from one in a book on antique furniture from New Mexico, but it was originally a dining table. I scrunched down the legs and made the top smaller..,,,Now it is a coffee table for Eskiaga's house.

I did miniature shows off and on for a while. When I was doing that, I had to do some pieces that were original, but more than one of a kind.

This is a cradle that was pretty basic. I turned it into a series of cradles based on nursery rhymes and fairy tales. They were fun to do because each one was different when they were finished. I dug around and found the very last one....I never got around to painting it. I might just have to do it now.

In the same notebook, I kept several inventories that I found at the university library over the years. This particular one was for a general store from between 1800 and 1812. It was an all around fun place to be. It contained a tavern, general store and post office. Get drunk. Buy some paper and a quill pen, write a letter and send it all in the same place. This place even sold marriage licenses.....Hmmmm....Get drunk and get married? I think that this store should have been named Las Vegas General Mercantile....

Some of the more interesting things on this particular inventory are.....Five books. Four dictionaries and one copy of Tom Jones! Tessie would like this store. They had nine shawls, all purple! The next to the last item on the list is kind of scary.....2 dozen scalping knives!

I have an antique cracker crate that is someday going to become this very general store. I want to reproduce everything on the list.


Tessie found plans for one thing that she wants me to make for her. I only made one of them back in the 80s.

It is a kind of San Francisco flower stall. It has three stair step shelves with a red and white awning over the top. She says that she could set it out on the sidewalk in front of the townhouse and make lots of money from the roof garden.

If I do that one, I will put up the plans for it on the blog. By the way, the notebook in question is under the plans for the flower stand...

For now, I am going back and reassure Mookie that he doesn't have to go back to the vet for six months. Traumatic kitty experiences aren't fun. I feel like I have to make it up to him. "Hey Mookie! How about some grilled lobster?"

See you tomorrow.

Saturday, May 29, 2010

So Much For Gold Leafing.....


Tessie won't be having gold leaf tables in the townhouse....She found out that it wasn't real gold.

We went to see "Ironman 2" this morning. When we got back, she was in a snit. She informed me, "I looked at the package and there is no mention of real gold anywhere on it! This stuff is about as gold as candy wrappers! I don't think that they are appropriate for my townhouse. I only want the real thing. It is, after all, supposed to be a high class abode."

I hate it when she gets all uppity. I took my tables and left. I will find somewhere else to put them.....They didn't really go with sixties style anyway. I am actually relieved that she didn't like them. Now I can go back to the Nakashima tables that I liked in the first place.

Since I didn't have a chance to do any minis this morning, I decided to play a bit with the rug patterns for the modern one and the zebra. I threw them both into the cross stitch program(PC Stitch Pro) that I have.
This is what came out. If you poke them, you can see them clearer. Unfortunately, the program picks up every color variation in photos. I did the zebra in just plain black and white. It is done in finer stitches that this. I would suggest printing it out and adjusting the extra colors to black and white. At least you have a stepping off point with this.
With the modern one, It made each area three or four colors. I did each section in just one color, using five colors in all. Again, my rug had more stitches per inch, giving more definition to the sections. ***ADD ON***I came back and re did the whole modern rug with PC Stitch. It is now a five color rug. I eliminated the extra colors. This rug is smaller than mine, but I did mine free hand. It will still be a pretty good size, depending on what size canvas you use. This pattern is for personal use only. Note the copyright at the bottom of the page. Thank you.
I may come back and re do the zebra one after I finish stitching mine.

I thought that these would be good graphs for someone just starting out.

Tomorrow I will be back to the townhouse, if Tessie will let me in. She is still in a snit.


See you then.

Thursday, July 30, 2009

Cross With Stitching....

Tessie is on the loose once more. She discovered that I was working on the pattern for the Celtic wall hanging to go in the stone box this morning and was not terribly pleased. She did keep here mouth shut on the subject though. I think that she is still feeling the consequences of three days in the stone box.

Letting her loose was a small price to pay for the two gargoyles that I gained. I should say regained. Walter ordered them from the Design Toscano catalog a couple of years ago as my Christmas present. They are a part of a set of five different gargoyle pens. Tessie immediately absconded with them and I hadn't seen them until she poofed them into the stone box with her yesterday. The other three are still missing.

I have a strong suspicion that there is a hiding hole somewhere in the house that she has stuffed with things that she likes. How else can I explain the things that go missing and are never to be seen again unless I ask her to help look for them?

When I started working on the rug this morning she appeared. She perched herself on my magnifying lamp and went to work. I noticed that she was working on a piece of cross stitch that I started a few years back. (The six year old lost interest and when she went back to look for it, it was gone.)

I asked Tessie where she got it. She claimed that it was all her own work, designed and stitched by her.

It is strange that there are really no stitches that weren't there when I stopped working on it last. Hmmmmm......I wonder if she could be prevaricating? It is also a Celtic pattern....I have no idea where I put it. I may have to use what is there and see if I can remember what it looked like.

This is what the pattern for the hanging looks like now. You are welcome to stitch the design. If you do, keep in mind that it is copyrighted and for personal use only. I designed it on my PC Stitch Pro cross stitch program. If any of you are interested in trying it, you can go to http://www.pcstitch.com and download a trial version to play with.

Tessie nicely volunteered to hold up the piece that I am working on to show you how I start. I always mark out the size of the rug on the fabric with a Pigma permanent marking pen. I use the .oo5 size in brown. It doesn't worry me that it will show when I am finished because that part will be cut off or covered with stitches. This gives me some idea how big it is going to be and how many more thousands of stitches I still have left to do. This is on#28 count fabric. There will be 784 stitches in a square inch. That means the whole thing will have 10,416 stitches......It isn't smart to count the stitches before they are done, but I can't help it. A long time ago I worked for a while as an inventory clerk.....I got into the habit of counting everything. It never wore off.... Bad habits are hard to break.

Anyway, I am almost finished with the first side of the first outside row.....This may take a while.

See you tomorrow.

Friday, September 5, 2008

A Stitch in Time

I spent the morning in my messy room. There's and idea for a room box. Reproduce my studio..... Oh wait. I already did. It's a box full of junk. I have several! I now have a path from the door to the desk and from the desk to the closet. You have to make a U turn at the desk to get to the closet. Hey! No comments! At least I can now get to the closet. I didn't say that the closet was clean. I just said that I could get there now.

Anyway, as I worked I tried to think of something that would make up for now working on the book shop. I decided that I would sit down and design an welcome mat for Buttercup. That wasn't enough. When I get on the cross stitch program, I don't want to stop at a tiny welcome mat. So I also did a bath mat and a mat that says "Come in!"

I thought that some of you might like to do them along with me. I am not going to give you a bunch of instructions on how to do cross stitch or needlepoint. There are a lot of sites on the web that tell you how to do both. Just put in "cross stitch instructions" or "needlepoint instructions" and you will get more than you need to know about both. Everyone has a different opinion on how they are done.

These are very simple patterns that you can make larger by doing them on a larger mesh canvas or by simply adding more border rows in various matching colors.

I still haven't figured out how to get these into regular format so that I can just upload them to the blog, so please forgive me for them being a bit on the dark side.

The welcome mat takes 3 colors of your choice. The strongest color should be the "welcome", with accents in the border of the same color. I used brown for that. Then I used a medium green for most of the border and a gold as the third color. Make it to match your own house or store by changing the colors. I am doing it on # 22 or 24 fabric. If I want it larger than 26X58 stitches, I will just add borders. You could do it on #18 canvas and then it would be bigger yet.

The bath mat is done in two shades of blue and white is the third shade. You can do it in whatever will match your bathroom. This one is pretty modern, so I wouldn't put it in a Victorian house. This one is 27X47 stitches.

The third one is the easiest. It is done with only one color. I think that I would like it in black and white. You could put a second color in the checkerboard edge or possibly a different color for the background. This one is 52X24.

Play with these and have fun. I would love to see the results when you finish.

I am going to go back to my little corner of the world and sort some more now. See you tomorrow.