Don't forget to poke the photos to enlarge!
Showing posts with label curtains. Show all posts

Thursday, November 30, 2017

Curtain Call

The little people have been leaving me alone this morning. 

I have a LOT of pins that I am messing with and they know that is a sign to stay clear of the area...

I cut glued and pleated the curtains for the room box.  I am not happy with them yet.
I don't think that I got them stretched tight enough and they are not hanging straight.

I am going to go back and re-pin and spray them a third time. 

I have a feeling that someone is trying to keep me from finishing this room box by Christmas.  It seems like it is one step forward and two steps back... GRRRRR....

I have started messing with a pattern for a valance box for the top.  That will make it better at the top.

I am not happy with the curtains themselves though. 

I thought that I should write this before I started tearing my hair out by the handfuls...

I am getting more relaxed as I write.  Maybe after a good cup of coffee, I will try again.

Wish me luck.  Back to work.

See you tomorrow.

Monday, May 9, 2016

Again... Waiting For the Glue To Dry...

Swags are drying as fast as they can.  Tessie is very impatient... I have the feeling that she is going to jump into bed as soon as the curtains are finished. 

Heaven forbid that I would have a chance to get the cover of the box done before she does!

They don't look too good yet.  I still have to add all of the trim after the glue dries.  I hope to get that done before Tessie shoos me out to take a nap... Fingers Crossed.

I was right.  Very little of the window will be seen. 
 Whilst the glue dries, I am looking for patterns to try on Pinterest.  I cheated and took screen shots of a lot of the bracelets and then printed them out all on one sheet of paper with my greeting cards program.  Hey!  Whatever works!
I did try one bracelet.  I am not quite happy with the last row. I should have squeezed another row in before I quit.. There is a small gap.  I think that I can fix it by running another thread through the last few rows. Wish me luck.

I really just wanted to see how it worked and how many beads in one inch of the length.  I am going to do another one with delicas.  They are a different size and may take more to fill an inch.  That's the only problem I can see with this loom.  You have to know how many beads in an inch and plan accordingly.

Anyway.  The glue is almost dry.  I will be able to put on the roses and other trim in just a bit.

Back to watching the glue dry.  Oh!  The excitement!

See you tomorrow.

Friday, May 6, 2016

Push Ups...

No.  Tessie and Zar are not doing push ups.  I am... With my fingers!  Amazing... No.  I am only pushing up fabric to pin.

I got the draperies and jabots installed. Tessie is objecting to me holding them up with tape.  Hey!  Whatever works.

She can't see through the tape and wants to know what is under there in the worst way.
 While the glue is drying, I am doing the swags that Tessie was supposed to do yesterday.  Never happened.

This is where the push ups come in.  Basically, I push the fabric up against the pins and then put pins in to hold the pleats in place.

This is the center one of the three below.
 I do them side by side, so that I can see how they are matching up.  Pretty good so far.  I will have to squash(technical term)the ends of the pleats down and cover them with the roses when they are ready to hang.
Tessie would have you believe that she did this part... Do you believe her?  I hope not...
Anyway, I have to go rescue the draperies if I want to finish them today.  Tessie is bound and determined to rip the tape off of the draperies.  If she does, we will be starting over.

"Zar! Grab her and hold her back!  I'll be right there."

Gotta run!

See you tomorrow!

Thursday, May 5, 2016

"I'm Dancing As Fast As I Can!"

That was Tessie's reply when I asked her if she had the swags all pleated and ready to go.

I have been making roses and she was supposed to finish the swags... Oh well.  I have the whole afternoon to do that.

I cut out the pieces... She seems to have lost the pin box.


Whilst she was supposed to be pleating, I was making 20 roses to decorate said swags. 

In case you haven't seen this done before, here goes.

I am using a tool that used to be a tapestry needle.  size 24 if I remember right. 

Anyway, I cut the end of the eye off many years ago and drilled a hole in a dowel.  Then glued the point of the needle into the hole and let it dry.

Now, about building roses...

For this bunch, I am using variegated ribbon. 
That is so that it will match the bed.  The roses on there are this same ribbon.

I start by sliding about a quarter of an inch into the slot.  Then I put a dab of white glue on the end.  Fold it over and start twisting the ribbon around itself.  The first turn I make in the ribbon is just after I use up the folded over part.  I turn the ribbon towards myself and again put a dab of glue on the part the is turned down. That is the last fold towards myself. Then I start folding the ribbon away from myself and glue again as I roll it around the rest of the rose.

 It does take a little practise, but it's fun, once you get the hang of it. I did 20 roses in about an hour and cut some leaves from the green ribbon.  They are simply snipped diagonally and then straight across.  The white that will be baby's breath, is unraveled bunka that has been snipped into short pieces.

Now if I can just get the swags pinned and sprayed, we will be ready to assemble the whole thing tomorrow.

See you then.

Wednesday, May 4, 2016

Taking Another Step...

I forgot a step yesterday.  I didn't put the stabilizing strips in the outer edges of the long curtains. 

I prefer doing it while pleating.  That way, I am sure that they are covered by the fabric. 

They did pretty well, considering that I did it after the fact.
Here you can see the strips of quarter inch wood that I put in the edge.

I also put three strips of stabilizing fabric along the width of the pleats to keep them from spreading. You can use ribbon if you don't have enough fabric.  I just put a line of glue down the middle and lay it across the pleats.

I will go back with a straight pin and go over all of the holes that I poked in the fabric to straighten the threads.  That way, non of the pin holes will show.

Here are the jabots that will go on either side of the curtains.  Again, I cut them about twice the width of the size that I needed and a little longer.

If the top edges were going to show, I would turn them under. 

I think that I am going to cover the tops with swags. 

The pattern in the picture is not to scale. It was just to show you that, if you have a fabric that looks the same upside down, you can get away with this kind of cut. It is a 45 degree angle.

For the jabots, I used Wonder Under.  That's the fabric stick-um that comes in sheets and you just sandwich it between two pieces of fabric and iron them to stick them together.  You can get it at any fabric or quilt shop.

I simply cut the jabots out and started at the outer edge, pinning as I went.  They are the same width as the curtains with a bit of extra to wrap around the outer edge of the curtain.  The raw edges of the pleats will be covered with trim.  It is not necessarily needed.  With the Wonder Under, it seals the edges and makes them so that they don't ravel.

Anyway, that's as far as I am going today.  I have to go to Wednesday Witches later, so I probably won't get much more done...

Back to work.

See you tomorrow.

Tuesday, May 3, 2016

One Pin Leads To Another...

 OK.  That saying not only pertains to Pinterest...

I am starting the curtains.  One step at a time... I am doing the under curtains today and the over swags and jabots tomorrow.

I can't get them all on the board at once.  These curtains are floor to ceiling.  Nine inches long!

I had to put four courses of pins in them instead of the usual three.
I start with the bottom and work towards the top. 

First of all, I put  quarter inch hem in all of the curtains on the bottom and the two sides.

I won't give measurements in this case, because your measurements will be different than the ones here. 

I will just tell you that you should cut the pieces for the long draperies the length that you want to cover and double the width of the space that you want to cover.  In this case, I cut two pieces 91/4" long by 71/2"wide.  I had to allow for the 1/4" hems on the sides and bottom.  The top will be covered. No need for a hem there.

After that, I pinned the long side of one curtain to the board with four pins.  Then I proceeded, one pleat at a time to pull the fabric in towards that edge.  Starting at the bottom and working up. I use the graph paper to get the pleats about the same all the way across.  Generally making 1/2" of fabric into a 1/4" pleat.

I usually only need three  pins for long curtains.  This time it took four because of the added height.

After everything was as I wanted it, I sprayed the whole thing with Suave Extra Hold hairspray.  I will do it a second time.  That should keep things in place until I install them in the room.

So... I am taking a break until they dry.  Then I will start doing swags and jabots.

Meanwhile, I have entertainment.  The squirrels are stuffing their cheeks with lettuce and apples.  I suspect that, very soon, there will be little squirrels running around.  They are taking entirely too much food back to their hideout.

Back to watching the hair spray dry. 

Tomorrow I will do the next step in the draperies. By the way, if you poke the "curtains" button under labels there are other curtain episodes to look at.  Don't forget to push the "Older Posts" at the bottom of each page if there is more than one...

See you tomorrow.

Monday, May 2, 2016

Highly Reccomended!


I have mentioned this book several times before, but I can't help but mention it again. If you really want curtains in your miniature scenes to look good, go to some of the used book websites and find this one. It was first published in 1889.  The original name was Practical Decorative Upholstery... but there is very little upholstery in this version. 
Sadly when they republished it in 1979 the title was changed to The Curtain Maker's Handbook.  I would love to see what they left out. 

I bought it in 79 or 80 and it has been my curtain making guide since then. 

I learned the pin board method of making draperies, curtains from Judee Williamson in a bed making class and after that there was no stopping me. 

With the help of this book, I have done a LOT of draperies and curtains.

It even has draperies for your mantle... I have a feeling that more than a few fires were started by having heavy curtains around the fireplace. But that's another story.
 They did leave a few furniture pieces in the later edition.  I did a number of these dressing tables.  There were diagrams for the base and patterns for the curtains and skirt.

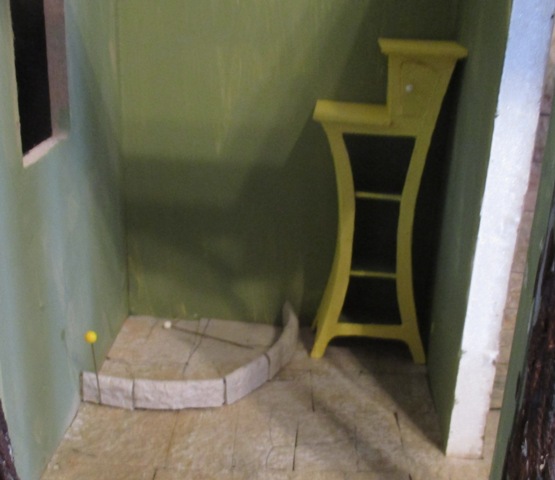
I don't have any of them left to show you and this room is not getting one.  I want a home for the walnut carved dressing table. I used bass wood for the base.  Most of it would never be seen...
 This is more or less what the finished dressing table looked like.  I did several variations to match some of the beds that I made.

I like the curtains in this room. Evidently some asymmetry was in style at that time.
What is nice about the book is, it has patterns for a lot of the curtain pieces.  Yes.  I said pieces.  They were made to look like a continuous piece of fabric, but they were individual pieces.

That makes it much easier to do mini curtains this way. Tomorrow, I will start showing you how that was done...

We cheated and went to a movie this morning.  So I didn't get anything done in miniature.  Sorry.

I am fascinated by this particular set of draperies...The diagram for the top of the curtains in the center of the window shows how they made the curtains "baggy" at the top.  I kind of like that and would like to try it sometime, just to see if it could  be done in mini. 

So many ideas in this book!  I had better get serious and finish this room box quickly.  Then I can try out some of the other things in the book.

See you tomorrow, with a big box of pins, fabric and a pin board!


Wednesday, August 12, 2015

I Have a Bit of Explaining to do...

Lucille asked if I had an explanation of the stabilizing strips anywhere on the blog.  I realized that I didn't. 

I don't do this unless the curtains are extra long and will hang straight up and down... And aren't attached to any walls, except at the ends.
I first secure them with blue painter's tape on the front.  Then I pull out all of the pins and flip them over.

I cut(or tear) 1/2" strips of the same material... I used contrasting here, because it won't show and it is easier to see.

I glue those to the back and let them dry.

Then I put them in place, gluing both edges to the wall. 

I am still contemplating the color on the chest.  I am kind of liking the yellow more than I did yesterday.  I am afraid that, if I change the color it will fade into the background.

Tessie approves.  She already raided the townhouse and my printer's tray to fill the holes.

I really have to get the white spots on those trees covered and I need to do the rest of the stones.  Especially the spot in the middle where someone spilled rust colored paint and tried to wipe it up, so that I wouldn't see...  It wasn't me!

Back to work.

See you tomorrow.

Tuesday, August 11, 2015

It Rained Yesterday...

Not a lot... But scary!  Walter was in the living room and I was in the bedroom.  When, all of a sudden, we were both made to jump by the loudest crash of thunder that I have ever heard...

That was because it was across the street and between the first two houses on the next block!  It started a fire in a palm tree!  The fronds were falling on a neighbor's shed.  Walter went over there and by the time he got there the neighbor, with the shed, was spraying his shed with a garden hose to keep it from bursting into flames. 

We felt lucky that it wasn't our Mesquite in the front yard.  It is about the same height as the palm tree.

Anyway, I never want lightening to strike any closer than that!  Scary!!!!

After the excitement was over, I worked on the weird bookshelf....I got the tiny door hinged with silk ribbon.  If you want to do this, you put one half of a length of ribbon the size of the door, half on the door and half on the body of the thing that you are adding the door to.  It works well. and doesn't show from inside or out.

Open.

Closed, with a knob made of the head of a small glass headed pin.  I simply ran it through the door in the right spot and cut the back off.

I don't think that the color is going to stay yellow on the outside.

After I finished painting, I discovered that there is NO yellow in the shower curtain...

What I was thinking was yellow is more of an ochre color.

Speaking of shower curtains... I didn't bother to put stabilizing strips on the inside to hold the pleats in place.... And It Rained!!!

I had to re pleat the whole thing.  Tessie will tell you that she did all of the work... She just handed me a couple of the pins...

Anyway, I will be putting strips on the back to keep it from coming un pleated this time. It is threatening to rain again to day. It's the middle of monsoon season here.  The rules are, you don't cross flooded streets in your car and you don't neglect putting foundation strips on the backs of miniature curtains... I am pretty good at the street part and I will, from now on, be more careful to put the stabilizing strips on the backs of mini curtains. 

I have to go spray the curtains some more.  Then I will cut 1/2" strips to glue to the back of them.

See you tomorrow.

Friday, August 7, 2015

It's Tessie's World...

The rest of us, are just along for the ride... At least that's how she sees things.

This morning, she strongly suggested that I should finish the shower curtain in the bathroom of the Fantasy Cottage, so that she could get cleaned up... That's how she put it anyway.

In order to do that, I had to recover the pin board.

There were barely any lines left on the graph paper and the wax was mostly gone from the covering.

 So.  I went to work and peeled off everything from the ceiling tile and started over.

First I cut and pasted three pieces of graph paper until I had a large piece that fit.

Then I made sure that all of the lines met up and glued it together.
It took three strips of blue painter's tape to stick the graph paper, covered with wax paper, to stick those to the board.

I used wax paper from Dollar Tree.  It worked OK, but I doubt that it will last for years, like the stuff that I usually buy at the grocery store.  Not as much wax...
Anyway, This is the fabric that Tessie picked out. 

That's why I say that it's Tessie's world and we only get to live here for her convenience...

I hate to admit it, but after it was stretched and pinned, she was right.  It goes well in the bathroom.  Almost bubble like, with all of those circles. And the background color is almost a perfect match for the paint.

I am going back now and spray the shower curtain with hairspray.  That will keep it from wilting when she takes a shower.  This could take a while.  Maybe a few extra coats of spray are in order. 

Back to the grindstone. Tessie is brandishing her whip and chair to keep me in line.

See you tomorrow.

Saturday, July 11, 2015

Moving Day...

OK. I threatened to do this a few weeks ago.  I was sick of looking at the curtains on the bedroom wall... This morning, I decided to do the deed.

The only trouble is... I forgot how hard it is to get into these frames!  The silly things open from the back and I built boxes to go inside each one.

Another problem is, the glass is loose.  It took me a couple of hours just to get these four apart, cleaned and back together... For all I care, they can stay dirty... Not really, but I did solve one problem.  I glued the glass in each one.  No more messing with balancing the glass on top and trying to shove the frame over them.
 Anyway, I moved the curtains out to the family room, where the other four were before.

I just remembered that I have two more of these frames somewhere.  Hmmmm...The possibilities could be interesting if I did the other two... Different combinations and the groups could be broken into different arrangements...

Something to think about.
 Anyway, I moved a couple of other things.  George the skeleton and his cactus garden are now in the hallway. 

I also put the Kitchen Christmas Island on the bottom.

I guess it's a choice between feast and famine on this one.

Personally, I prefer the Christmas Feast. I think that this one has held up pretty good... I made it in 82 or 83.

Yup.  It's an Oldie! And the cat still hasn't gotten to the turkey!

I am going back now and see if I can get those foursomes to hang any straighter.

See you tomorrow.

Monday, August 25, 2014

A Little Higher on the Left...

I still haven't gotten the curtains installed.  I decided that they needed a valance.

It was really easy to do, since I decided to do it wall to wall.  No building a box.

I simply measured and cut a piece of graph paper the width of the area and two inches from top to bottom.
Then I sketched a curve that I liked.  I did take away a bit more from the center, making it look more Moorish.

Then I cut it from illustration board and spray glued the fabric to the front for a smooth finish.


I clipped the edges, making Vs at the outer curves and straight cuts to the inner ones.  That makes for a flatter back side.

I glued the edges around to the back with Fast Grab.

Then the trial run...

It is not an easy task with Tessie holding it up.  I would say, "A little higher on the right."  And she would lift the left side.

Then I would say, "Your other right." That didn't work and she didn't think that it was at all funny.

So I switched to a little higher on YOUR right and she got it.  Now we have to work on the other side.  Whichever side that may be... As you are looking at the screen on your computer it would be the right... For her, it is the left.  You have to be extremely specific when working with her... If I don't tell her that she should come down from there, chances are she will still be there when I go back in to start working again later.

By tomorrow, I will have the curtains done.  I still have to take down the inner curtains and put up the windows.  That shouldn't take too long... However...

We are going to see "Expendables 3" this morning... Oh well.  Maybe I will be a bit late with the window...Hang in there.

See you tomorrow.

Sunday, August 24, 2014

Semi Distracted.....

OK.  I did do a bit of work on Daisy's cottage yesterday...I pleated the curtains and sprayed them with hairspray. 


This morning I poked them in place to see how they looked.  Not bad. They need some trimming.  They look a bit squished.

 They pick up the color of the wicker chair nicely.  Before, the chair looked like a lonesome dove.  Nothing else in the room like it.

I moved the chest and shelf from the kitchen into the dining area.  I am liking it there, better than in the kitchen. 

Now all I have to do is find something to put in it's place in the kitchen....
 Meanwhile, I worked on the Cellini stitch bracelet while watching the new Dr. Who... I like him.  The last Doctor had a bit of a childish side that was not to my liking.  That's just me though.

I ran out of beads... Oops!
Something else to do whilst watching the Doctor?

I couldn't resist any longer.  This is one of the new balls of yarn.  It is part wool, part silk and some nylon.  Very nice to work with.

Yes.  I know.  I should be working on Daisy's cottage, but sometimes there are way to many toys to play with.  Talk about childish? 

I wonder if I could set a record for the number of different projects worked on in 24 hours?  Never mind... Back to my knitting... I will think about minis tomorrow.

See you then.

Wednesday, August 20, 2014

Curtain Call, Once Again....

I decided to do the curtains for the bay in the living room this morning. 

I have several tutorials on curtains and draperies in other spots on the blog, so I won't go into a lot of detail this time.

I did the usual edging with glue and turned in hems.  I didn't do it on the outer edge, because I had the pattern printed all the way to the edge...Bad move on my part...

What's wrong with this picture?

I didn't notice that the printed edges didn't match in pattern... It looks OK on the first curtain, but the second one is questionable... Just a quarter inch difference in the pattern throws the second curtain off.  It is only terribly noticeable in the bottom half of that curtain...Totally different design on the pleated section. 

I may either do the second curtain over or maybe it won't be noticeable when the furniture is in place.  The left curtain bottom will not be visible when the furniture is in place...Only I will notice.

Or am I fooling myself to save work?
I have sprayed the curtains with extra hold, unscented, Suave pump hair spray.  I will at least put them in the bay to see how they do.

I usually use ribbons for tie backs... Somehow that doesn't work for this house. 

I had three possible chains.  I think that I like the top one the best.  It is from a necklace from the early 20th century.  It was already broken.  No usable jewelry was harmed in the making of these curtains.

I am going back now to do a second coat of hairspray and to talk to myself about redoing the right side curtain... I'll be OK as long as I don't start answering myself... Maybe....

See you tomorrow.