Don't forget to poke the photos to enlarge!

Thursday, May 31, 2012

Searching.....

This is the third location that I had in mind for the stretcher frame.  It would work perfectly, if you could see the embroidery clearly....But I plan to put a bed at the front of the room.  Granted, it would be in the diagonal corner, but it would still hinder the view.

I searched for a suitable bed this morning.  I found one in one of my books on Medieval furniture.  It is a box type canopy bed and the top valance is suspended from the ceiling with ropes....No muss,no fuss.  No making four posts that will be covered up with curtains.
I drew it out on graph paper.  I think it will be perfect for the space.  According to the book, it was only 3' by 6'.  The curtains hang from 7' high.

Tessie helped with the plans.  I thought of making the canopy 6" and she corrected it....Not enough height for her to jump on the bed without hitting her head.

As I said though, I don't think that the frame will work in the opposite corner.  It will have to go back downstairs.
While I was doing that, Zar decided to finish a bit more of the half timbers in the upstairs room.  Then I heard a lot of clunking noises.  He moved the loom into place to see what it would look like.  He also moved the settle that was in the room with the loom before.  At least, now I know that there is room for at least a couple of pieces of furniture in the space.

After I leave you, I am going to do more half timbers and start the bed.  I am thinking that I would rather see the canopy hung with chains than  with rope. 

I am seeing in my future, a set of bed hangings and coverlet with black work embroidery... After all, the embroiderer would want something other than a plain blanket on the bed. 

Back to work. 

See you tomorrow. 

Wednesday, May 30, 2012

Trying to Find a Hoop....

OK....Sometimes the stream of consciousness thing gets in the way of other things.

I went into the workroom with the intention of finding my favorite embroidery hoop....An hour later, I left with the start of a cartonnage box and finally, the hoop.

I saw all of this nice book board when I was searching.  It was not doing a thing....Just filling up space.  So, I decided to put it to good use.  A new work box to carry with me to Wednesday Witches would be nice.


I got this far.  I cut all of the pieces, found material and started putting it together.  Then I looked up and there was the hoop.  It was hanging from my desk light....So much for the excuse that I couldn't find it and had to do something else in the meantime.

I don't really need a new work box today.  It was just something to do until I remembered in what special place I had stored the hoop, so that I wouldn't forget where it was.... 
You would think that I would see it when I turned on the light.  Nope.

Anyway, all's well that ends well...

I wanted to do some practice work on pulled thread and drawn thread work.

Back in the 80s when I was young and foolish, I did a whole three sided valance and curtains in drawn thread work in mini.  It was white on white and not the easiest of stitches.  Foolishly, I sold them...

I tried a bit of pulled thread work this morning and have the same reaction to that in mini as I do in real life.  It is a pain and really doesn't impress me at all.  It is simply gathering a bunch of threads together and pulling the thread tight around them...Just not my cup of tea.

I do think that I am going to get back into the drawn thread work though.  At the top left there is a section of fabric prepared to be worked.(The dots to the right are the pulled thread.) 

The part by the dime is done over three threads at a time and the stems are over two threads. Not a bad try for not doing it in 25 years.  As I said though, I need practice.

It is not something that I can take to the meeting to work on...Too much counting and I need a magnifier to do it.  So.....I will do something else this afternoon.

I have to go get ready now.

See you tomorrow.

Tuesday, May 29, 2012

Walking the Plank

I must have stained about 50 planks this morning....The walking part was a lie.

I am close to running out of planks again.  I got the back wall of the second floor timbered.  Some of the side walls.  A little of the outside.  Some of the basic ones in the bottom floor.

I am still nowhere close to being finished.

I talked Tessie and Zar into taking down the blue tape, after everything was dry...I don't think that they will voluntarily do that again....They both looked like Blueman mummies when the tape was down.
We took a break and I, once again, took up the practice needle.

I have a very limited pallet of silk thread.  I am going to have to go find some green at the quilting store soon.

This time, I did a bit of a sampler.

In the space of less than a square inch, I have seven different stitches.  From top to bottom, there are rows of stem stitch, blanket stitch, herringbone stitch, feather stitch, stemmed french knot, fly stitch and single french knots on the end of the fly stitches.

Now back to the regularly scheduled program...
I fitted the annex onto the main part of the house.  It is going to take some clamping and taping to get it hooked together.  It's not time for that yet.

I want to finish all of the half timbers, with the exception of the connecting timbers.  Then I will do that.

It is coming along.  Slowly but surely...At least I am not bored, working on two buildings at once.

Back to work now.

See you tomorrow.

Monday, May 28, 2012

Tangled Silk....

First you need a pattern.  So out comes the graph paper.  I drew up a pattern for a stomacher and the front of a man's coat.  By no means a finished sketch.  I just wanted to get an idea of how big the embroidery would be if someone were doing it on the new frame.
Next, You know the old question, "How do you get to Carnagie Hall?".  Answer?  Practice!

I grabbed a piece of china silk and hooped it.

I really haven't done this for years, so yes, practice was needed.

What you see on the frame took me about 45 minutes. 
Here's a close up.  It makes the silk look like burlap and the silk sewing thread looks more like knitting worsted.

Not too bad, considering how out of practice(there's that word again) I am.

Basically it is just lazy daisy, back stitch and single wrap french knots.

The silk sewing thread is very slippery and sometimes irritating to work with, but I think that it will be worth the trouble in the long run.
Tessie had to get a few stitches in to see how it looked. 

Here you can see how small the floral spray actually is.  Smaller than her hand.

Even worse is the fact that you can barely see the needle that I was using.  I went and found one of the smallest quilting needles that I own.  I think it is a 12 or 14?  It is working nicely. 

Three or four threads to a backstitch....That is about 1/32 of an inch.....

Yup.  I'll say it again....All I need is a little practice....

See you tomorrow.

Sunday, May 27, 2012

Back Up and Start Over....


Remember the stretcher frame from yesterday?  Forget it!

It was irritating me.  It just didn't seam right.  I went back and looked at the engravings in the Saint-Aubins book and then started digging through the text that I had not read in a few years.

It was easy to figure out, after a closer look.  The slots on the long bar were four sided and the stock that they were cut from was square.  What I had made was two sided, like a quilt frame.  Oops! 

If you want to do it right, look at things carefully before you start... In other words, don't follow me the first time.  I may be making a quilt frame instead of embroidery frame.  So back to the drawing board.

Actually, I didn't re draw the frame....I simply put the slots about 1/2" in and left room for the handles at the end.

I then drilled holes on all four sides of the stock and carved the slots out.  I used an Exacto to shape the handles on the ends and round the center portion of the bar.  The cross bars and the pegs were the same.

I did draw up the saw horse pattern on quarter inch graph paper.  I made the base an inch and a quarter wide and the top 1/2" wide.

Then I went and cut stock that was 3/32" into 1/4" planks and two 1/2" planks for the top.  There were four for the legs from the 1/4", two cross bars, 7/8" long and one stretcher bar that was 1 3/4" long.

I didn't bother to do much measuring after that.  I sanded the pieces, making the top ends of the legs just slightly mitered on the inside. and the ends of the cross bars just slightly mitered to fit in between the legs.  I glued these together, using the pattern as a jig.  There is a mistake in the drawing.  I didn't show the end of the stretcher bar sitting on top of the cross bar and I drew the stretcher bar below the line  and even with the cross bars in the second part of the sketch....Oops again.  Oh well.  I am in the middle of making cinnamon rolls.  I am short on time....I only have about an hour for the dough to rise...

Now to try them out.  Pretend that the side shelf is attached to the wall instead of sitting on the joint stool....I kind of like this arrangement because you can clearly see where the embroidery is.....but.... 

I kind of like this one too.  The frame would sit forward a bit, because the shelf would be attached to the staircase.  This way frees up the wall behind Tessie and there could  be storage space under the stairs. 

I am going to go think on it for a bit and see how the cinnamon rolls are doing...Rising or not?

Have a good Memorial Day weekend to those of you that celebrate it.  No matter what, have a great day!

See you tomorrow.

Saturday, May 26, 2012

I Was Framed!!

Sounds like Tessie....

Actually, I started the embroiderer's frame this morning.  Very simple.  four boards, four pegs and lots of carving and hole drilling.

Here's the pattern, if you would care to build one.

I started with the long bars.  My only tools were an Exacto knife and some emery boards.

When you are doing something with holes in it like this, it is safest to do the holes first and then the rest of the carving.  There is less chance of splitting the wood that way.  Always start with the cuts that go across the grain of the wood(stop cuts).  Then do the lengthwise cuts. After that was done, I sanded all of the pieces.

I didn't make it very fancy, because these frames weren't very fancy.  Anyway, most of the frame will be covered by fabric and stretcher ropes.

I needed pegs to hold the frame in place.  Thank heavens for fancy toothpicks.  I just cut the top off and then shaped the tips to a point.

I drilled holes every quarter of an inch  in the plain sections of wood. That is so that the depth of the frame can be adjusted.  It should be the depth of a worker's arm or the depth of two if there are two embroiderers working on the same piece from opposite sides. 

Next, I will build two sawhorses to go at one end of the frame and attach a shelf  on one wall of the house to hold the other end. 

Unfortunately, I am afraid that the only wall large enough is the wall by the door.  Otherwise, it is going to have to go upstairs.  I would rather have that as living quarters.

Tessie and Zar have ascertained that the frame should set at table height. That would be about 2 1/2". 

Now I need to get the saw horses built and stain everything.  The last step will be to stretch fabric on the frame.  I will show you how to do that tomorrow.

See you then.

Friday, May 25, 2012

Still Miles to Go.....

Lucille was feeling sorry for the "Poor Threesome" in the comments yesterday....Poor threesome,
 my foot!!!

While I get stuck with the cleaning and straightening, there they sit.  Lettice said something about the current price of tea in China and they all turned and looked at me...

Tessie glared at me and said, "That's what we need.  Bring us some tea and cookies. And don't forget the lemon."

Poor threesome indeed! 

Tessie found her "Mini Me" and is now clamouring for more work on the 1/4" scale half timber wall house.  I will put it on the list.....

I am doing pretty well so far, but it is going to take time.  I have about a quarter of the space all cleaned out, but with the "stream of consciousness method" it is slow work.  I pick something up to put it away....Then I have to decide where it goes.  Then I go to the spot where I think it should live, question the validity of the placement, then turn around and head in the opposite direction....By that time, I have no idea where to put said item.  And on it goes...

I did get the closet straightened and a couple of the bookcases.  I really need to get rid of something.  There is no longer room for anything new. Maybe after I finish putting things away, I will be able to find a few unnecessary items to discard.

I am trying for the old saying "Use it up.  Wear it out.  Make it do or do without."  So far, I am not using it up or wearing it out fast enough!

Anyway, I am doing pretty good when I am not staring out the window or at the TV...

While I am working, I have another website to keep you out of mischief. 

Sharon T. sent me this one yesterday afternoon.  That's another reason I am not finished yet....Any excuse will do.

You have to see this one.  It's the best yet of the ones that have a lot of old books magazines and catalogs on line.  It even has movies and music to download.  I went for the furniture and different needlework books first.  So many books.  So little time.

There were also some really neat house plans among other things.  You name it, this site has it.  http://archive.org/index.php  At the top there are categories.  I spent most of the evening in the "text" section. The only drawback that I could see is, it looks to me like you can only download things for a week.  I don't know what happens after that. I guess they must just disappear. Mostly I probably will just use the site on line.

So...Now that you have something to keep you busy, I am going back to work.

See you tomorrow.

Thursday, May 24, 2012

A Little of This. A Little of That....

It's a beautiful morning...Except for the wind that is blowing sideways.  I am opting to stay inside and keep away the allergies and sneezing.

Therefore, I am wandering here and there.  I am in
my "stream of consciousness" mode at present.  Whatever hits my eye, gets done...Kind of.

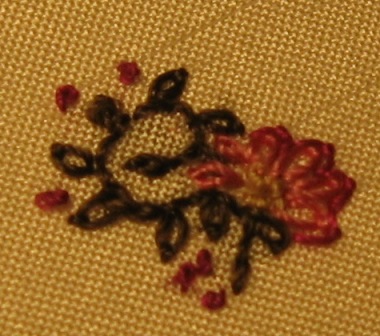
First of all, Heleena asked about the pattern for the Tudor rug.  I am posting it as is.  As usual, it is not for resale or profit.  You may copy it for your own use.

I am still going to make some adjustments on it with more detail.  Keep in mind that you will have to poke the photo to make it larger if you want to print it off to work on it.  Also, go back to the preceding entry and look at the original photo for the true colors.  I designed this so that I could more easily see the pattern.  The background is really brown, not white.
 
After I took the photo of that, I did this....Yup.  More half timbers.  I probably still don't have enough.  I have to do the outside sides and the whole inside of the main building, not to mention door frames and windows.

Now comes staining....Ick!!!

While I was thinking about what to do next, I went hunting.

I don't know how many of you have iPads or something similar...Kendles, iPods etc., but if you do, I hope that you know about all of the old, free books that you can download.

Poke the photo and have a look.  These are from project Gutenberg and listed as e books on mine.

Most are from the turn of the last century.  All are wonderful.  I have had a lot of the needlework books for a while now.  This morning I found some great Mission Furniture books with patterns in them, some interior decorating books from that time period and some costume books, among other things.

I have this thing about trying to read books from and/or about the period that I am working on in miniature.  One of the books that I found this morning is "Manners, Customs and Dress During the Middle Ages and During the Renaissance".  The title alone, is a book. I cant wait to start reading this one.

 But first....Tessie and Cordie are giving Lettice a guided tour of the area, since she is in unfamiliar territory....

Showing her my workroom this morning was not a good idea...She went into shock at the sight of it.

I know just how she feels.  I guess it's time for some "stream of consciousness" cleaning...Pick up something and put it away...Spot something on that side that belongs somewhere else and put it away....What is that shoe doing in the wallpaper shelf?  Put it away.  What is the loaf of bread doing in with the shoes?  You know what I mean...

Go look at some of the books or make a rug.  I'll get back to you later....Much later.  I have a room to clean.

See you tomorrow.

Wednesday, May 23, 2012

Infamous UFOs

Now that I know what is going to be happening in the Crooked Cottage, I am going to have to fill it.

First I did a bit of searching and found that the English  embroidery guilds go back to the 12 and 13 centuries.  The guild that I was aiming for was the Worshipful Company of Broiderers. it was founded in 1561.  I found out that, just as in France, both men and women worked at it.  They all  worked at the same jobs and the men got paid more...Nothing has changed....

Next, I went looking through my UFOs(Un Finished Objects).

I found a few that qualify for what I have in mind.

The first photo is of the crewel bedspread that I started years ago....Why didn't I finish it?

It was just before we moved to this house.  I had foolishly drawn the pattern on the material with one of those disappearing ink pens that quilters use.  Then somehow the original sketch of the pattern that I designed disappeared....Oops....

That means, if I ever intend to finish it, I have to redraw the whole top two thirds of it...As I said before....Oops!


The two smaller pieces are a Sharon Garmize pattern for a firescreen or sampler...I can't remember which.  Just like I can't remember all of the flowers that were on the coverlet...

I used the excess to do a small band of flowers.  No particular reason that I can remember.  Other than the fact that I can't stand to see a piece of unused silk gauze left over.

The piece to the right, you might recognize....At least the other half of it.  It started out to be a cushion cover for an Elizabethan bench.  I needed a square of embroidery for the stool for my dressing table.  So, this will have to be a cushion now...

The next group is a carpet that I designed from the scrap of paper that you see at the right.  Again, I did this a long time ago.  I think that it was one of the first attempts at making my own patterns.  I did it by hand and later put it in the Pattern Maker program for ease of reading.  After doing some of it, I realized that I over simplified the pattern.  At the time I was working on larger canvas and it would have been huge if I had put all of the details in.  I am going to have to modify the pattern.  I really like it because it is true to the Elizabethan period.

While I was digging through the UFOs I found this... I really do want to finish it.  It is a lace collar for myself.  As you can see, I have a way to go.

Tessie and Lettice were admiring it and, as usual, Tessie was making plans of her own....I heard her say, "Look Lettie!  If we are really nice to Casey, maybe she will make us both new collars..."

Don't hold your breath, Tessie....I still have a couple of years of work to do on that one....Shrink it down???  I think not!

See you tomorrow.  I have to go stitch for a bit now.

Tuesday, May 22, 2012

The Crooked Embroider's Shop....

This is the book that gave me the idea to turn the crooked cottage into an embroider's workshop.  I found it on Amazon a couple of years ago.  It is beautifully done and has really good information about how embroidery was being done in the 1700s and what kind of equipment was used.


This illustration from the book is a line drawing that the author made of an illustration from another book....Pretty well done and informative.

I used it as a jumping off point for drawing up plans for a stretcher frame for the cottage.

I like the idea that only one end was supported by a saw horse.  The other end sits on a ledge that runs the length of the room...Very convenient. 
I drew up plans for a frame and sat it in the shop opening.  The nice thing about drawing plans on graph paper, in scale, is that you can instantly see how the piece is going to fit in the room.

I may make it a little longer, but It seems to fit very well.  If I run a shelf along one wall and put the sawhorse under the other end, it will leave room for other things in the room.
I still wanted more details.  That's when I remembered that I have  Charles Germain de Saint-Aubin's book, "Art of the Embroider".  It is translated from the French and is profusely illustrated.  I should have thought of this one in the first place.  This is a translation, so I don't have to worry about trying to decipher it.

The book was written in 1770, so everything in it is accurate to the period.  Granted, it is French, but at that time, the French were stealing ideas from the English and the English from the French.  So....I think it will be accurate enough for what I have in mind for the crooked cottage.
This will give you some idea as to what I will be getting ideas from.  The original illustrations are intact.

That funny looking machine on the right side is a bobbin winder.  I imagine that there were quite a few people with relieved arm muscles after that was invented.

There is also a large colored section of photos of embroideries of the time. 

Saint-Aubin's father was also an embroider.  Who knows?  Maybe the line goes back further in the family.

I don't remember any mention of the rest of the family.  I may have to break down and re read this epic.

I guess I had better get started.

See you tomorrow.

Monday, May 21, 2012

Half Timber Town.....

This morning I didn't get to mini, because we were out doing other things.  This afternoon, I got some of the foundation stonework done....At least put in place. I finished the main building and am about half way around on the base.  That takes a lot of time....Two pieces for each stone and all individually cut and fit.

As I worked, I started thinking about how much I like half timber buildings.  Maybe I lived in one in a former lifetime.

Then I thought about all of the ones that I have.  Parts of the fairy tale castle make it a "sort of" half timber. That building has a lot of different architecture patch worked together.  But there is definitely a lot of stone work and some half timber.  So I say it's in.

Then I walked around and looked. 

The most recent one is the Crooked Cottage, which I bought, but I intend to do some work on it, so I guess it could be included.  I decided yesterday, that it will be an embroiderer's cottage.  I have drawings of a workshop from a little later time than some of the other cottages, but I think that they must have had pros doing lace making and embroidery a little earlier than the drawing.  It is from the 17th century.  After all, QE1 probably needed a LOT of people to do all of the elaborate costumes that she wore.

The next one is Tessie's hat shop...The outside qualifies...If I seriously wanted to do it as part of a street of shops, only the inside would have to be altered.

Oh!  And I guess I would have to replace the motorcycle with a horse.

Otherwise, it qualifies.


Then there is the Witches Warehouse.  This one calls for a bit of suspension of belief, if you don't believe in witches. 

Personally, I live with one every day, so I have to believe that it qualifies.  Maybe on the outskirts of town...I a forest somewhere.
This is the only one that is realllllly questionable.  Do you suppose that anybody back then thought of putting wheels on a house and dragging it around behind a team of very strong horses?

And anyway, The Clockwork Caravan doesn't move.  It's on a stone foundation just like the rest of them.  It has a turret(We just won't tell anybody that there is a nuclear powered shower inside.).

The roof pavilion would be an excellent place to view the jousting. 

OK...So it is a bit questionable.  Hey!  This is my town.  If Zar wants to live on the street, I say he can do it.

I am now thinking that we need an inn, a market place, maybe a blacksmith's shop...This could grow into something bigger than our house if I let it.....Maybe I should just stop thinking now....Yup. No more thinking today.

See you tomorrow.

Sunday, May 20, 2012

Sidetracked From the Beading Sidetrack....

It's getting pretty bad when I start off on a sidetrack of beading and then get sidetracked from that to kumihimo, but that's what happened.

You see, the kumihimo boxes and the pendant boxs were right beside the beading....And much easier to get to.  Not nearly as messy.

So....I opted for the easy way out.  I had eight or nine cords all finished and ready to go for necklaces.

All I had to do was put the caps on the end of the cords and a closure on those.  The cords are all cotton on these.

The first three are a poly clay snail that I did a few years ago, a fancy pendant watch from Walmart and a composit turquoise doughnut.  Don't ask why I didn't finish these before.  Actually, the watch was finished, but I don't think that I ever showed it on the blog.  The snail was finished, but I always wore it on a plain chain. No excuse for the turquoise.

The next three are a obsidian doughnut, a very old turquoise pendant(Native American) and a coiled and beaded caboshon that I made last year.

The first one is woven with silk cord.  The second one with overdyed perle cotton.  The third one with embroidery floss, all six strands.

You can do kumihimo with just about any kind of thread.  My friend Maureen just learned a couple of weeks ago and is doing interesting things with colored hemp.

This last one is my favorite....I just started it yesterday and I only have about 9" done so far.  I bought the silk at the bead show.  It is actually  a kind of silk ribbon that is also over dyed.  I am going to try to get some better photos after it is finished.  This picture doesn't catch the light like the real thing.

The colors are an exact match for the streaks of Australian Opal that are in the stone pendant. 

I just might have to finish this one today.  Might....

Tomorrow I will go back to work on the Weaver's Cottage.

See you then.

Saturday, May 19, 2012

The Mad Scientest Strikes Again...

This morning, I found Zar working on the chimney when I awakened. 

He couldn't manage the paint bottles, so he tried chalk pastels.  Good try.  It seems to me that the color was a bit too distinct and almost patchwork like.

Sorry Zar, nice work, but not cigar.

 When I backed away and took a photo, there was little or no color visable.  Let's just say that we were curious about how the chalks would work.  Way too subtle.

If I had been happy with it, all I would have had to do was spray it with fixative.  So much for that idea.
It's hard to see in the far away photos.  But the paints blended better and the rocks are far superior to the ones with the pastels.  I also like the way that the shaded areas look too.  Much more blendable.

I also did a bit of dirty washing on the plaster, between the timbers.  That didn't work at all with the pastels, but the paint worked well.  It always does.  Hey, I am still that six year old that likes to see what will happen when I use a different box of crayons.

Now you can clearly see the pattern of the stone, wrapping around the chimney.

I still have to put stonework around the main part of the house and around the base board.  If I finish that, I am going to reward myself.

Walter is out playing golf and I am free to play for the rest of the day.


I am going to read a good book.  I got this for mother's day. 

Then I am going to play with beads for the rest of the afternoon.

See you tomorrow.

Friday, May 18, 2012

No Sharpies...Mark It!

I went to look for the big packs of Sharpies in lots of colors this morning and neither Walmart or K Mart had anything but hot eighties colors.  Not suitable for stained glass.

Sooooo....I went with Bic Mark it.  They were cheaper than the Sharpies and had FOUR bonus pens in black.  You can't beat that.

They promised to be permanent and they kept their promise on the plastic anyway.

I had all of the lead in place, so I decided that I had nothing to lose, trying to remove the Sharpie ink from yesterday...I used nail polish remover and it worked.

The color on these pens are much more subtle than the Sharpies and in some cases I had to use two coats.  Actually, that was better.  It meant that I could have the same color with different hues if I wanted them.

I just held the plastic up behind the glass to see how they looked and I was very pleased.

Of course Tessie, the critic,  had to keep telling me to move it a bit to the left or right.  I never did get it exactly where she wanted it.

They will look different after I cut them out and put a mitered frame around them to install, but for now, I am satisfied.

In this photo, you can see some of the different textures you can get when you play with the nail polish a bit. 

I Made sure that all of the strokes went lengthwise of the glass.  It really does look a lot like some of the stained glass that I worked with in real size. 

Years ago, I took a stained glass class with a friend.  I turned out quite a few pieces....I no longer have any of them. 

I have no desire to go back to it and replace them with new ones.  I had cuts on my hands and bruises from the hammer that we put the horseshoe nails into the work board with....Minis are much easier to do and not as many cuts and bruises.  At least not when doing stained glass...The real thing is too much like work.

We are going to see the Avengers this morning.  When I get home, I am going to finish the chimney if it kills me!

Tessie and Zar have both volunteered to use a whip and a chair to keep me in line until I do it.  Wish me luck.

See you tomorrow.