Don't forget to poke the photos to enlarge!

Wednesday, October 31, 2012

Getting Ready to Go Out....

First I painted my nails.   I used black and white for the undercoat....Just dabbed it on every which way.  The a coat of copper crackle over that.  Please note that my hands were already shaking and unsteady.  That always helps when you are not trying to stay in the lines.
Next, I tried to cover up the sores on my arms and hands...That wasn't altogether successful.

I used toilet paper and white glue to make the edges of the sore spots.  Then I covered that with regular make up.  Some brown eye shadow blended it in with  the rest of my skin.  The inner raw part was a burgandy lipstick and some more brown and black eyeliner and shadow.  Just a tiny bit of white along the edges to make them stand out.
This is the fiinished cover up....My skin is definitely not as smooth as it used to be...

I went back in and used black and brown eye shadow to emphasize the veins and contour of my hands.

Nope.  You don't get to see all of me.  Well.  You do, but you don't.

Here's me with all of the sores and the wig.  You can see part of my face in the side mirror.

I emphasized all of the facial creases and made the eyes dark and hollow looking. 

Unfortunately, I am blind as a bat without the glasses.  They don't add to the effect at all..

And I still agree with the shirt..."I don't do costumes.

This was the centerpiece for our table at the restaurant....Does that give you some idea of what was on the menu?  To spite the photo, the food was excellent!  A good time was had by all.

HAPPY HALLOWEEN!!!!!
See you tomorrow...Hopefully back to normal?


Tuesday, October 30, 2012

Trial Run...

OK.  I may not get to the Korean style Clockwork Cottage for a while, but I couldn't resist trying out my idea to see if it works....It does!

I had a wooden box with a recessed lid just sitting on a shelf.  I had a large cone of Peaches and Cream natural colored cotton and I had Aileen's Tacky glue that had been sitting open a while to thicken it.

All set to go.
I cut the cotton in random lengths.  I think that there were between 15 and 20 strands.  It doesn't matter how many or how long.  Just chop them off.

Then I took one end and started dipping it in the glue.  I spread it on with my fingers, making sure to get it well covered.  You could probably use a pair of rubber gloves to do this part.  I didn't have any.  Hey!  White glue washes off easily.  I did the whole length of the yarn.  All pieces.

Starting at the base of the tree, I arranged them into a trunk shape, separating them strands to form roots.

I twisted as I went up. About half way I split the trunk into a couple of limbs.

As I went, I pressed them firmly to the wood of the box.  At this point, they are easily maneuverable...It gets harder as you go because the glue starts drying.  I kept a wet cloth within reach to keep them moist.

When I got the branches arranged the way that I wanted them, I let them dry a bit.

The next step was to cover the whole thing with gesso.  The first coat went on white.  I will do another coat using the color of my choice.

I have to wait for the gesso to dry now.  After I get the second coat, with color on it, I will antique the whole thing with a darker color to make the tree stand out.

Shades of the 60s and 70s.  We used to decorate stuff with this technique.  It was much less complicated.  Geometric designs and straight lines.

I am going to have to do some more experimenting.  This could come in handy for all kinds of moldings and other trim in mini. 

I am going to wait for the gesso to dry and do some knitting whilst it does....

See you tomorrow.

Monday, October 29, 2012

It Only Hurts When I Type...

It's only two days until Halloween.  I haven't done prop makeup in a long time... I decided that I needed to do a bit of practicing before Wednesday.

I think that I remember it.  These are the tools I used.  Not the best, but I was too cheap and too lazy to go find a costume store. 

I got the "stage" makeup from K mart... I can't say that I am impressed, but it does work.  It only has to last through lunch. 

I am not worried about myself, but the other witches may lose their appetites with what I have planned. 

You saw the shirt and wig yesterday.  Now I am amassing wounds and trying to figure out how to have fingers fall off without losing any for real.

See the eyelash glue in the first photo.  That works, in a pinch, if you don't have any liquid latex for raising the edges of wounds.  It does take a while to dry, however.

I made little circles and smoothed out the outer edges to blend with my skin. 

Then when that was dry, I started with the makeup, blending as I went.

It must look OK so far.  George was somewhat surprised when I showed it to him....

He requested that I remove his glasses, so he wouldn't have to look at it.

I am going to leave it on for a couple of hours and see how it holds up.

Then bright and early, Wednesday morning, I am going to get up and do my face and both arms.  It may take a while....

Sorry about the lapse of minis.  I am going to go do something of that sort as soon as the wounds heal a bit...

See you tomorrow.

Sunday, October 28, 2012

Before and Maybe After.....

Still dragging things out of the workroom to toss...Don't worry.  Nothing that will be missed.

I started at the top of this bookcase this morning...Poor Clockwork Cottage... It needs love and attention.

I kept looking at it as I cleaned...Then I stopped.  Grabbed a quad pad and started drawing.
I looked through the kits that are still not made and decided that none of them would look right as a "tree" house.

As I studied the Clockwork Cottage, I realized that it would work.

There is already some stone foundation made of DAS on the right side that looks like the Korean foundations. I have a head start!

I started doodling and this is what I came up with.  It may be a "three tree house".  I will have to work that out as I go along.  I need a new supply of DAS. I am out.  

I will also have to decide what the best way to do the trees would be.  I think that I will try a couple of techniques.  One would be all DAS.  The other would be to do the trees with twine and glue and then covering it with DAS to smooth.  I am leaning towards the second one.  I think that it would be faster and more flexible.  The stonework would still be all DAS.

I would like to say that I am starting this right away, but I am going to resist.  I need to finish the Weaver's Workshop before I switch again.

While I am stuck cleaning the workroom, I am keeping Tessie busy elsewhere.  I have a Halloween lunch to attend next Wednesday Witch's meeting.  One of our members owns a great restaurant down next to the Tucson Museum of Art, called Cafe a la c'art.  Judy invited us all down there to eat....On the condition that we wear costumes. 

Everybody in the group is used to me wearing a shirt with spiderwebs printed on it or something of the sort.  Every year I tell them I don't do costumes...

What they don't know is, I used to do costumes and go all out.  I just got tired of it.

This year, I found the perfect shirt for me.."I don't do costumes" is printed across the front in bold letters.

Tessie is helping me accessorize.  I found a punk rocker's wig....I will probably look like a cross between Sammy Haggar and Twisted Sister in it...That doesn't matter.  I'm going in zombie makeup... Complete with torn nails and scabs... That'll teach them to hassle me about costumes!  Now where did I put my extra pint of blood?

Tessie helped by cutting up an old t-shirt and making a spaghetti scarf.  With matching bracelet from the leftovers. I kind of like these for regular wear.  Right now there are dozens of instructions on U Tube for them if you are interested.  They are really fun to make and you can do it plain or with beads and other adornments.  Some versions are quite nice.

OK.  That's it for my break.  Back to work.

See you tomorrow.

Saturday, October 27, 2012

Serendipitous Accident....

Oops!  I am back to cleaning this morning.  I went to pull this file drawer out this morning, to see what was at the back...I hadn't cleaned it out for a while.

It is one of my favorite storage systems and I was tired of trying to get to it where it was, so decided to move it....Mistake of the year...Thus the Oops!.

I started this system about 30 years ago, when I was pretty new at minis. It still works.  Why mess with a good thing?  Maybe some of you already do something like it.  If not, here it is.
I bought this old oak 6X8" index card drawer and was trying to think of something mini to do with it when a friend gave me all of these little plastic boxes.  They were from her husband's business of making eyeglasses.  I think that lenses were shipped in them.

You have seen them before as holders for rugs and other embroidery projects.  That started later.

I put them in this drawer to store and then it hit me.  I had been cutting out book covers, advertising signs and other small printables....Back then known as magazine clippings.

They were things like book of the month covers, advertising for magazines that were in scale for one inch and other paper products.  Back then you could buy sheets of color advertising signs at shows and shops.

When I got bored and had nothing else to do, I would sit and cut them out while watching television.

I had thrown them into envelopes and put a name on the outside of each, but the envelopes filled fast. I couldn't see at a glance what was in them.

Then it hit me that I could use the boxes instead of storing them in the drawer.  Ready made system for little things.  If you enlarge the photo, you can see the categories.  I used to have paintings and other artwork in there too.  Those outgrew the boxes and went elsewhere.

Anyway, when I gathered everything up and straightened I found several things that I had been looking for.  

Remember.  Drawer in the corner.  Out of sight. Out of mind...There was a reason.  I could only pull it out so far and then it would hit the side of the next cabinet....Some fool took out the stop blocks to keep the drawer from sliding out all the way....No.  It wasn't me.

That piece the is sticking up at the left of the drawer is miniature photos of our trip to London about 10 years ago...Does that give you some idea about how long it has been since I have straightened said drawer?  
I also found the patterns for three sizes of shopping bags that I haven't made for a while... 

Last, but not least, I found my favorite diner photo....This is on my list of "someday minis". 

This is, believe it or not, a blank greeting card.  I bought a whole box at the thrift shop one time. I guess that the original purchaser couldn't find an occasion to send them to friends. 

I think that I will go frame one of these and hang it somewhere.  All it needs is a little love and fixing up and it would be a cute cafe....Use your imagination...

See you tomorrow.

Friday, October 26, 2012

The Mind Wanders...

I just thought that you might like to see what happened to the leaves.  The photo doesn't do them justice.  I stuck them in the frames of already hung photos.  I kind of wish there had been a couple more.

They bring a touch of color to this arrangement of gold frames.  The photo at the bottom left is of Amare.

I did the pencil drawing above it and the three cross stitch ones.

The rest is a little of this and a little of that...I just like the gold frames together.

I have been cleaning room boxes and shifting them from one place to another in the house.  This is a very early Latin American room box that I did around 1982 or 3.

The two pieces of furniture are Colombian.  I built it inside an old speaker case that Walter had in the storage room of our old house....He was much more careful about "storage" after I built that.  Hey!  If it's not being put to use.  I have to do something with it.  That's how it works.
OK.  You may be asking why I am showing shots from a Korean drama on here...I have been watching a historical/fantasy drama called Faith on Hulu.

I have replayed episode 17 several times.  I want the whole movie set in mini!  When I saw this particular building, paused the show and took in the details.  I WANT THIS in mini.

The detail is amazing.  The rock foundation is just like the Buttercup Book Shop!  The colors are the same.  But this building has a tree embedded in the plaster on the side and the shingles are all pieces of tree trunks with the bark still attached.
I kept trying  to get Lee Min Ho to move over, so that I could get a better shot.  He just wouldn't co-operate....Most irritating.

This set just goes on and on.  It is literally a whole village with all kinds of fascinating architecture.  I want it all.

I did the best I could, taking shots of the screen.  The drama is very good.  The sets are outstanding inside and out. 

Since it is a  bit of a fantasy, I doubt if these building really existed in history. The interiors are beautiful...I see a historical Korean mini coming  one of these days!

Back to looking for more half timber wood...

See you tomorrow.

Thursday, October 25, 2012

Odds and Ends...

OK.  I am back to minis.  This morning, with Tessie's help I started doing more half timbers for the weaver's cottage. 

I don't know how she manages to stay stainless whilst doing this task.  I have both hands covered in stain.

This building sure has a lot of surface to cover with half timbers, as small as it is....It could take a while.  I need to hunt up still more wood. 
I also lifted the crooked house off of it's foundation and put little strips so that the door would open without scraping the pavement.

Good try....I did it with the door closed.  When I opened it, I realized that I never did the stonework under where the door is when it's closed. Most irritating.  At least it doesn't drag now.

Why didn't any of the residents point this out to me?  Now I have to pave that strip before painting.
What is even more irritating is the stupid chimney.  The builder of the house ran the wires through the chimney to the outside of the house.   The big question is, why did he put it on with almost a quarter of an inch gap at the bottom edge?  The bottom of the chimney is higher than the bottom of the building by a noticeable gap.  Never mind the fact that I didn't pave under it.  I can still do that, but there will still be a big gap under the chimney.  I guess I will have to do some fancy brickwork at the bottom to cover it up.  Or when i take off the chimney to finish the wiring, maybe it can be moved down by drilling a new hole in the house itself...  If that doesn't work, there are always weeds and bushes growing around the base of buildings....Right?

I am not going to take the chimney off today to see.  That is for another time.  I am going back to work on the half timbers for now.  The stain should be dry by now.

See you tomorrow.

Wednesday, October 24, 2012

Wednesday is for Witches...

Not a lot of mini stuff going on.  I did get some more knitting done on one of the Christmas scarves.  Did I mention that I love the Lion Brand Amazing yarn?

So does Tessie....She seems to think that this is a VERY long blanket for her...Dream on, Tessie.  This one's not yours.  Christmas is coming.

For minis, I took along a bunch of mini gourds and seed pods and marked them for cutting and drilling.  Finished that part.  Now for the hard work....

Just as I was writing this, Walter came in and handed me a bit of Autumn...He spent the last two days in Michigan and a lot of time on air planes.  He did bring me a present...(thanks Walter)Which Tessie immediately confiscated.
We don't see many trees of the color changing variety around here, so this is a special treat...and I am a lot bigger than Tessie....She can either hand them over or I am going to fight for them.  Take your pick Tessie.  How do you want to do this?
I think that she is smart enough to hand them over without a fight...We shall find out shortly...

See you tomorrow.

Tuesday, October 23, 2012

My Inheritance

And nobody even died!

Walter is retiring in a couple of months and will no longer be in need of dress up clothes anymore.  He was about to toss his ties. He knows better, so he gave me first dibs on them.

This first bunch will probably be saved for larger crafts.

He seldom wore them for work, except for special occasions.  Most are almost like new.  All are silk.  Need I say more...?

I love the two ties on the right.  The outer one was designed using one of Jerry Garcia's(Grateful Dead)paintings.

The second one in looks quite normal until you get up close...Then there are Warner bros. cartoon characters carefully hidden among the paisley print.  I have to do something with that one soon!

I could also call this entry the anatomy of a necktie.  Probably a lot of you have seen the value of men's silk ties in mini, but for those of you that haven't, here goes.

Years ago, we used to be able to buy big bags of ties in the thrift shops for a few bucks.  Nobody wanted them.  Nowadays its a different story.  They are at least a couple dollars for the good silk ones.

I seldom buy them any more unless needed or I see one that I know that I will use.  If you do go looking, make sure there is a small tag on the inner seam that says 100% pure silk.  That's the key for good mini work.  The synthetic ones don't glue well.

When you take them apart, don't throw anything away.  Well maybe the labels.... The rest can be used.  The cheap stuff that is the lining of the bottom maybe.  The outer skin is at least a quarter of a yard of silk cut on the bias.  You do have to be careful how you use it because of the grain of the fabric.  If you want it to fit around curves it is good to use it on the bias(threads running diagonally).  If you want it to hold shape, use it on the grain.  The bias stretches.  The straight of grain doesn't.

The very inside of the tie often has a couple of even weave white pieces that can be used for cross stitch and other purposes if you are desperate for materials.  I used to make quite nice kitchen towels from them with a cross stitch band across the bottom and a fringed edge.  Waste not, want not.

This is the end results of a couple of ties from the 70s or 80s.

Both are silk.  Most ties will make a couple of chairs like this if you cut them carefully.  Need I say, the wider the tie, the better.

OK...Everybody run for the nearest thrift shop...do not cut up the ties of the man of the house!  He will not be happy.  No matter what beautiful minis you make from them. 

Under no circumstances are you to use the phrase, "Casey told me to!"  or "Tessie said I could."!

See you tomorrow.

Monday, October 22, 2012

Moving Monday....

OK.  I kicked the last of the party people out of Madam Tessie's this morning...Time to move on to something else.

I perched it atop the tall bookcase in the bedroom, along with a bunch of dragons and gargoyles to keep it safe.

Zofi refuses to leave...She's not paying rent and not getting any customers in this out of the way spot, so I don't know what is going to happen. 

Meanwhile, I moved Spike's Crypt down to the top of the jewelry/tool chest.  I kind of like it at eye level.  Now I can see all of the details that I couldn't when it was up on the bookcase.

Buffy and Spike went back to arguing and trying to kill each other there.  So things are back to normal...

Spike:"Here Buffy, I baked cookies.".  Sure he did.
Buffy: "Just set them on the table.  I wouldn't want to get blood on them when I try to kill you again..."

See?  Normal...
If you enlarge this one, You can see more of the detail. 

One of my favorite pieces is the little grim reaper toy on the second shelf.  A friend of mine sent him from England.  When you turn the little yellow handle on the side of the base, he swings the scythe back and forth...

I put one of the portable closet lights in the top to take the photos.  I really prefer it when it is dark and dank.
While I am thinking about it, I should tell you that this is another of the birdcages.

The outside front is all faux marble.  I did the front and sides with illustration board this time, so that I could take the marble all the way to the corners on the top. I won't go into the technique.  I have it in other entries.

I added regular molding on the top edge of the main wall to make it more substantial looking.

The corner posts are the birdcage itself.

The real reason I am showing this view is the roof.  People are always wanting different ways of making roof tile.  These slates are more of the illustration board.  I cut the tiles a bit larger than I wanted them to look so that I could overlap them. Then started at the bottom and worked up, just like regular shingles. After I got them all glued in place, I let the glue dry. Next I primed them with gesso and a stiff stencil brush.  Last, I painted them with charcoal gray Ceramcoat and a bit of shading with a little lighter gray here and there.

It just proves that you can work with whatever is at hand.  The trees on the outside of the building are made from branches of my rosemary bushes in the back yard.  Stripped of leaves(put in soup) and with railroad greenery added.

Anyway, now I can start on something else...Oh yeah....I forgot about the workroom...Workroom?  What workroom? 

See you tomorrow.

Sunday, October 21, 2012

I Need a Good Shrink...

No.  Not a psychiatrist....A shrink in my stash of supplies and unnecessary miscellaneous items that "might be of use someday".

First of all, I seem to be whittling down the yarn stash pretty well...But I did buy more "Amazing" Lion Brand this morning.  Don't tell.  It's for Christmas gifts.
The workroom is coming along, but I need to get out the stepladder...

See that "plant shelf"? Every couple of years, I go up there and sort through the things there.  I usually get rid of a few pieces and move other items that I don't use much, up there to fill the holes...It is a neverending progression.

As soon as I get everything in front of the closet off of the floor, I will do it once again.   I don't, in my wildest dreams, think that anybody ever, ever, ever uses these so called plant shelves for plants...How would you get up there to water them without a ladder?  No way.  No how.  I am not dragging a ladder in once or twice a week to put water in pots that are up there...Nope.  Just a fancy name for storage that some builder thought up as an excuse for leaving that part above closets open.  Cheaper to build that way.

Next, I can't call this part a plant shelf.  No excuse for the top of the book shelves...I definitely have to put Tessie and Zar to work...The two room boxes on the end are finished, inside and out...Just empty and used for "storage".  Translation?  Used to shove things in, that I don't have a place for.

Can you tell that I also have a thing about baskets?  The three on top are not being used.  I must find something to put in them!  Otherwise, I will have to get rid of them. 

And the house that you see sticking out on the right side?  That's Zar's to deal with.  It's the Clockwork Cottage from a few years ago.  I am getting the itch to take it down and work on it, but if I do, then something else will have to go up there to make room in the real world....Do you see where I am going with this?

Everything in the universe is connected to everything else.  To make room for one thing, something has to move over....

Solution?  I guess it is time to start at the top with the plant shelf and work down, once again....Maybe tomorrow.  Walter is going to be out of town for two days.  I can make a big mess the first day and straighten it back up the second....Unless he reads this, he will never know what happened...Maybe...

See you tomorrow.

Saturday, October 20, 2012

Tessie Is Back!

Yes....Tessie made it through the party...However, some of the rest are still sleeping it off.  In particular, Zar is still hanging from the rafters.

I am still cleaning in the workroom.  This morning I decided to tackle some of the project boxes.  Namely, baskets.  I have one box for woven baskets and one for coiled.

I have only started on the coiled.  I found ten baskets...Only two finished. Tessie grabbed one and filled with fruit.  I am left with the unfinished ones, with orders from her to get to work and finish all of the remaining starts....She is off somewhere now, taking a ill earned break.
I also am sorting out all of the projects in knit and crochet(real world) that I have to finish before and by Christmas...
Do gifts to myself count?  this last photo is of a scarf that I am doing for myself.  It is all of my leftover sock yarn. 

I may have to resort to unraveling a pair of socks to finish it.  It's OK though.  I have plenty of socks, but only one leftover sock yarn scarf. 

I really like it and it's all MINE!  Gift to me from me.  I think that counts.

I am going back to the basket making box now.  I will work on baskets as long as Tessie is standing over me with a whip and a chair.  The first time she leaves, I am going back to the big stuff.  I can watch Korean Dramas on Netflix whilst doing that.... It's kind of like reading a book and knitting at the same time.  Multi-tasking can be fun.

Hey! Tessie left.   I am now officially hiding from her.  I locked the bedroom door.

See you tomorrow.

Friday, October 19, 2012

It's Time to Call it a Day......

The party's over....

I got up and finished the rug this morning.  I did the usual glue hem method that I use.  I simply smear white glue over the last rows on the edge, making sure that it covers a row or two of plain canvas.  Then I let it dry and trim it down.

I don't like rugs that are turned under.  Toooooo thick.
I still need to snip a few tails here and there, but otherwise it's done. 

Did I mention that I treated it so that it will be impervious to bug beer and other potions?  Let them spill their drinks.  I'm not worried.

Yes, that's bug beer that you see.  The weaver is a bit careless.  Not to worry.  The rug is fine.

How do I know?  As soon as I finished it and took the photos, Tessie grabbed it and shouted, "OK.  Party's over!  Everybody go home.  I need a nap!"

Then she proceeded to wrap herself in the rug and start snoring loudly. 

Since some of the attendees had already passed out or were close to it, I didn't bother to chase anybody out.  As long as they are quiet, they can stay where they are.

It was a good party, as Tessie's parties go.  No fights.  Just happy bug beer drinking and fortunetelling. 

I am not  cleaning up after this bunch.  Tessie can do that whenever she decides that she has had enough napping.  I am on to other pursuits. 

See you tomorrow...

Thursday, October 18, 2012

"I Just Can't Wait Any Longer...."

That was Tessie about an hour ago... I made a mistake.  I put the signs on the side of the building before I finished the carpet...Bad move.

The sign was done on The Print Shop 15.  I simply did the lettering in a text box and added a frame.  Then I printed it on parchment paper.  After I cut it out, I added all of the gold with the same stuff that i did the front of the booth with earlier.

A party ensued as soon as the signs were in place.

Tessie was wandering around telling everyone that there would be two fortune tellers in residence for one day only....No waiting....Unless the junior fortuneteller disagreed with the head fortuneteller...Then....Well you know what happens when they disagree.  Poor Zofi.

You have to enlarge the first photo to see what the bottom says....It says, "your fortune is in your own hands".  Smart move on Tessie's part.  No guarantee that her predictions will come true if you screw it up yourself...

It only took about 15 minutes to found up everyone.  That included the time it took to get Zofi out of her spell.

I will probably add a few more things to the inside.  That can be done when I run across anything that has been hiding in the workroom.

As usual, it is getting louder as the morning goes on...I don't think it will stop any time before one or two in the morning....

Personally, I am going to close the bedroom door and let them carry on until they run down.

The workroom is on the other side of the house, so let them have their fun.

Who knows?  Maybe I will find a new project whilst rummaging around.
On second thought, I only have an hour or two of stitching left on the Gypsy rug.  Maybe I can find a quiet corner and finish that...

See you tomorrow.

Wednesday, October 17, 2012

So Much for Peace and Quiet...

When I woke up this morning, the Terrible Two were still sitting, staring at the Ouija Board...

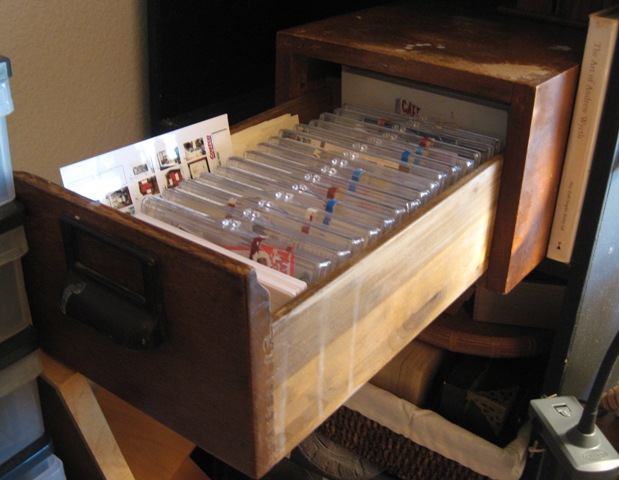
I was still thinking about what table I wanted to use, so went into the dreaded workroom to see what else I had.

I found it!  And a very fast tutorial for you.

A round black lacquered table is just the thing and it fits better than any of the others.

It is one that I made when I was working on another project and, like this one, I changed my mind on what to use....I seem to do that a lot. 

Anyway, it's so simple.  The bottom is a black wooden lacquered chess piece with the top cut off horizontally.  Then I decided how big I wanted the top and cut out a circle from 3/32 bass wood.  I painted it black and put a coat of gloss varnish on it to match the base and glued it on.  That's it.

With smaller chess pieces, you can make various other side tables and stools.  All you have to do is find the chess set in a thrift shop, like I did.
While looking for tables, I got sidetracked and started cleaning....Yes.  I know it's hopeless, but it would be nice to be able to at least get to the desk in a straight line....No jumping over things to get there.

Then when I got there, I decided it would be nice to be able to find things on top of the desk.

By that time Tessie had come out of the coma and started her usual supervisory post...

The desk was about half cleaned off when I ran across my old tool roll.  I made this a number of years ago and it is very handy to have.  I take it when I want to do projects at other locations.

Here's how I did it....I think that I may have done an entry on this a long time ago, but it may be worth it to repeat it for some of you that didn't see it the first time around.

It doesn't have to be as elaborate as I made it.  You pick and choose the tools that you want to carry.

In my case, there is a pair of needle nose pliers, some small Fiskar squeeze handled scissors, wire cutters, a six inch ruler, a mechanical pencil, tweezers, glue, small fine scissors, a tape measure and a small notebook.

I simply cut out two pieces of fabric and a piece of quilt batting a little larger than all of the tools as they were lined up on it.  Then I cut the orange piece the same width, but a bit longer than the blue, so that, when doubled, it would hold the tools in place. (The pocket for the tape measure is separate and sits on the outside of the scissors pocket.)  


I did some embroidery on the outside to quilt the blue.  Then I folded the orange and did fancy stitches on it and hand stitched it to the blue so that it would hold all of the tools in place.

I laid the orange on top of the inside of the blue and secured it with pins.  Then I used the checked bias binding all around to hold it together.

I tacked on the center of a piece of ribbon that would wrap around twice and tie. 

As you can see, when it is rolled up, it makes a great place to take a nap.

I don't think that Tessie has quite gotten back to normal yet....I may try to tiptoe out of the workroom and let her sleep a while longer....I hear that forgetfulness powder takes a lot out of you....I wouldn't want to awaken her by banging things around in the workroom...I should go check on Zar...

See you tomorrow.